Menu Bar

File menu
- New — Ctrl+N : To create a new project the user can click on File New
- Open... — Ctrl+O : To open a project the user can click on File Open. Another way is to double click on a previously saved
.ovprjfile.
Warning
Opening a project from Windows Explorer by double-clicking on it, will always open it with the last installed OEVIS® version.
Example: The user installs version 2.0.0, then installs version 2.1.0, the extension association will be paired with the version 2.1.0. Conversely, if the user installs version 2.1.0 and then installs version 2.0.0, the extension association will be paired with the version 2.0.0.
- Open examples...: Opens the Examples folder. See also the Examples section.
- Save — Ctrl+S : Saves the currently open project
- Save As — Ctrl+Shift+S : Saves a copy of the currently open project
Info
Once saved, by clicking File Save or File Save As, an OEVIS® project is split into two different files:
projectName.ovprjwhich contains the project informationprojectName.ovguiwhich contains the GUI settings
Warning
Saving a project copy with the Save As command will change all properties containing relative paths to absolute paths, in order to mantain project integrity.
- Recent Projects...: Opens the Recent Projects dialog and allows to choose from the list of recent projects or open/create a new one.
- Recovered Projects...: Opens the Recovered Projects dialog.
Launcher
Clicking on File Launcher will open the Create launcher dialog.
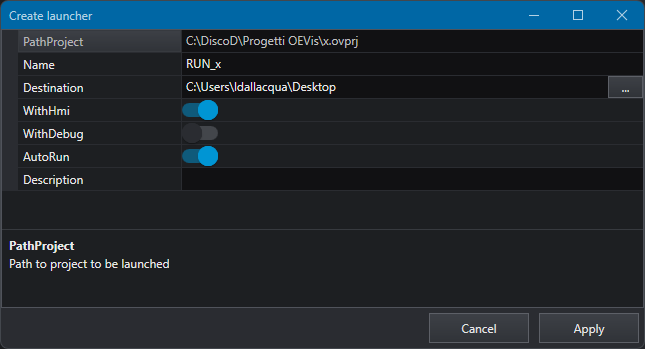
With this functionality ou can create an automatic launcher to an OEVIS® project. The launcher created in this way can also be placed in the Startup folder, in order to run automatically OEVIS® at startup.
shell:startup setup
In order to add the launcher to the Startup folder, open the Run... window — Win+R. In the text field type shell:startup and press OK. This will open the Startup directory. Copy and paste the created launcher in this directory.
In the Create launcher dialog the user can select:
- Name: Launcher file name
- Destination: Launcher destination folder
- WithHmi: Launch the project directly in HMI mode
- WithDebug: Launch the project with an active debugger
- AutoRun: Launch the project already in RUN mode
- Description: A project description
View menu
- UI Type: Switch from full view to set up the project to HMI only view.
- Show Window: Recalls hidden tabs or makes closed tabs visible again.
- Reset Window: Restore default size and position of Job tabs.
Tools menu
App settings
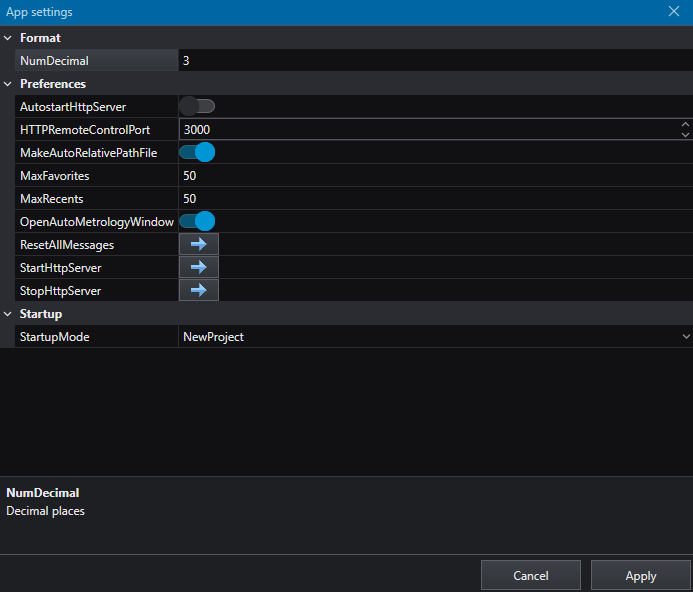
App settings allows to configure system parameters which are globally valid in OEVIS. In this window, users can tune functions behavior based on their preferences.
Format
- NumDecimal: default number of decimal digits.
Preferences
- AutostartHttpServer: sets if web server starts automatically on software startup. Web server is used to remotely control OEVIS through API commands (Only one server instance can be started on local machine so use this option carefully)
- HTTPRemoteControlPort: sets the web server's port
- MakeAutoRelativePathFile: if enabled, when a path file is set into a property transform its value to relative path respect to current project's file (if project's file has been saved)
- MaxFavorites: maximum number of objects among the favorite tools.
- MaxRecents: maximum number of objects among the recent tools.
- OpenAutoMetrologyWindow: automatically open the metrology editor for metrology tools.
- ResetAllMessages: reset the 'Don't ask again' to false and show all messages.
- StartHttpServer: starts the web server
- StopHttpServer: stops the web server
Startup
- StartupMode: choose whether OEVIS® should open a new project, the last project or the list of recent projects upon startup.
Help menu
- Documentation — F1: Opens the offline OEVIS® software documentation.
Info
The user can access the documentation at any time by pressing the F1 button. If a tool is selected, the relative documentation will be opened.
Language

Switch between the available languages.
Theme

Opens a dialog that allow the user to customize OEVIS® theme settings, such as base color (light/dark), font and font size, logo, etc.
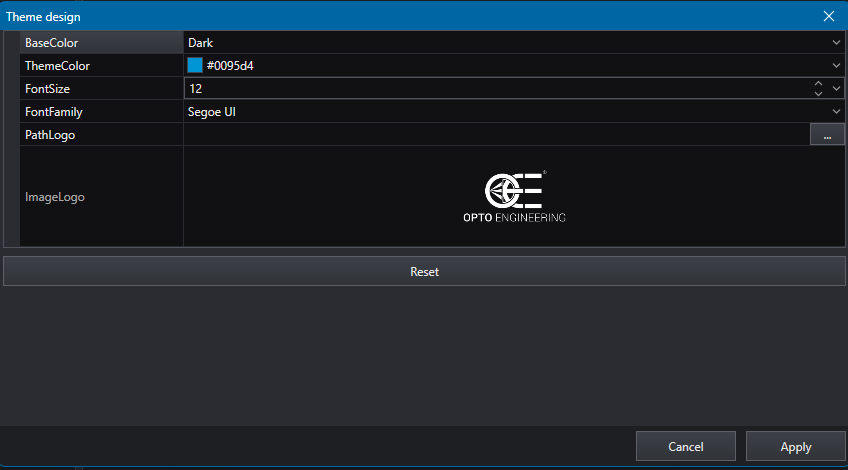
By using the Reset button the user can, at any time, restore the theme to the default parameters.
The Logo can be also used in combination with HMI control ImageLogo by setting to true the property UseThemeLogo.
User

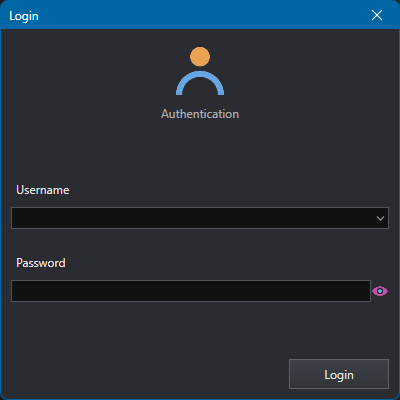
Switch between the users available on a project basis. This button allows to see the account you are logged in with and allows you to logout. In case you logout, a login is required to access the programming functionalities.