Project Explorer
Project
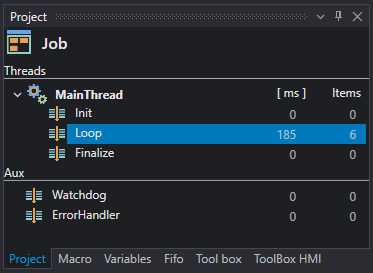
Shows the main divisions of the work project, which is split in Threads (usually MainThread) and Aux. The MainThread is divided into three main tasks:
- Init: tools that are executed only once at the start of the project run.
- Loop: tools that are executed in loop.
- Finalize: tools that are executed once at the end of the project execution.
Info
If the project is run once  — F6 the Init and Finalize tasks will be run every time.
The Aux section is divided into two main tasks:
- Watchdog: tools that run every so many milliseconds (see setting in System/Settings).
- Error Handler: tools that are executed when an error occurs in one of the thread's tools (see setting on System/Settings).
Watchdog
You can use the watchdog task to periodically inform the connected devices of the execution state or parse information from other devices.
Multithreading operation
If the Multithreading add-on is enabled, all the created threads will be available in the Threads section. Read more in the Multithreading section.
Macro
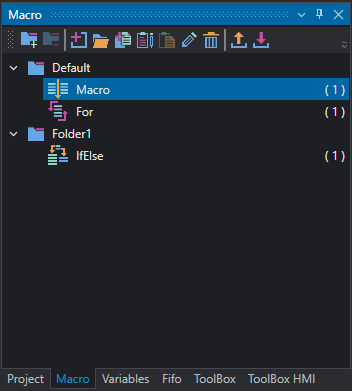
In the macro tab you can find the list of macros/action/contidions/loops present in the project. Items are organized into folders that can be edited by the user.
Note
At least one folder must be present in the project. If you create an auxiliary folder and delete the Default one, macros will be created by default in the newly created folder.
By double clicking on a macro item it is possible to access it for editing, even if it's not instantiated in the Job. The same can be done by selecting a macro and clicking on the  — Open button in the tool bar.
On the right side of each element a counter shows how many times the macro is instantiated in the Job.
In the Macro tab, following actions are possible using buttons in the tool bar:
 — Create new sub-folder.
 — Delete selected sub-folder.
 — Add selected macro to project.
- — Open the macro and allow to edit its content.
 — Duplicate and create a clone of selected macro.
 — Copy selected macro.
 — Paste copied macro.
 — Edit macro name.
 — Delete selected macro.
 — Export macros to separated file (
.ovmacro). — Import macros from file (
.ovmacro).
Import and export can be useful when the user wants to share macros between different projects. Exporting macros creates an .ovmacro file which can be imported from other projects.
For more information on how to create/use macros, see further information in the Programming reference section.
Variables
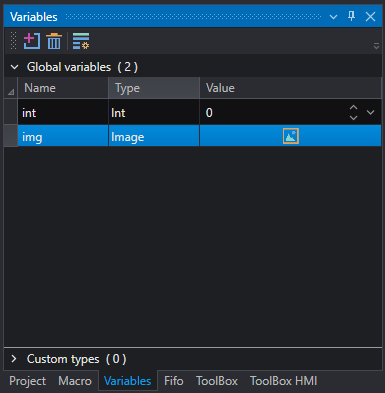
For each project you can create global variables, that allows you to use one value for single or multiple tools, this can be helpful to:
- Give a known value to an input property of a tool;
- Create a condition for the execution of a macro;
- Make easier to change a particular value, especially if it has been assign to multiple objects;
- Preserve values between different iterations of the project.
Using the icons at the top or right clicking in the empty space you can add or remove a variable. Double clicking allows you to edit variable name, type and value.
From this panel is also possible to access Custom Types definitions, see further information in dedicated section.
FIFO
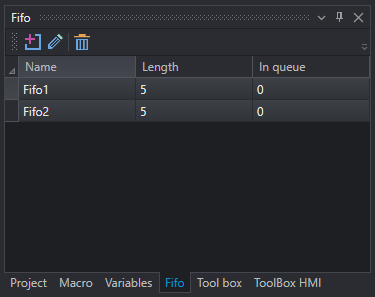
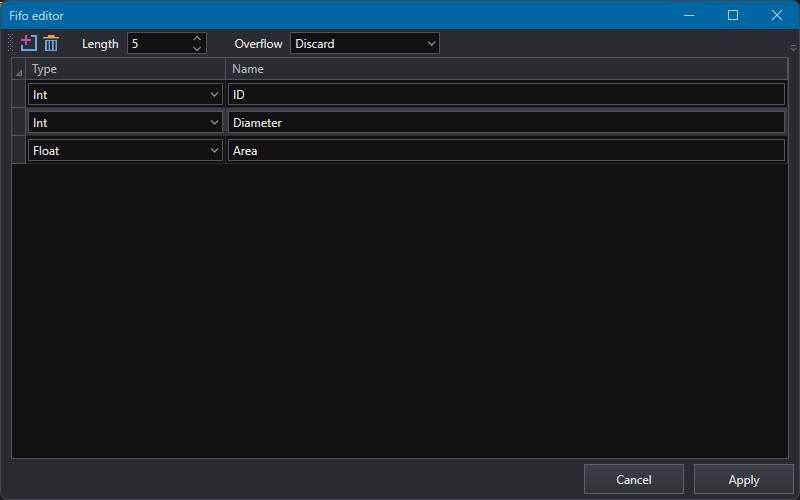
For each project you can create a FIFO (First In, First Out) queue. The queue is used to pass parameters between threads; using the appropriate tools a thread can insert or remove an element from the queue (In queue). Using the icons at the top or right clicking in the empty space you can add, edit or remove a FIFO queue.
Each queue can contain a certain number (length) of objects. The object can be composed of variables of different types.
Using the overflow parameter you can select the behavior to be taken if queue is full and another object is added among:
- Discard: discard the new element.
- Override Last: overwrites the last element in the queue.
- Override First: overwrites the first element in the queue.
Read more in the Multithreading section.
Programmer insight
FIFO queues are used to implement the producer-consumer pattern in multithreaded operation. Use FIFOs to synchronize execution between threads and exchange data between threads safely.
Tool Box
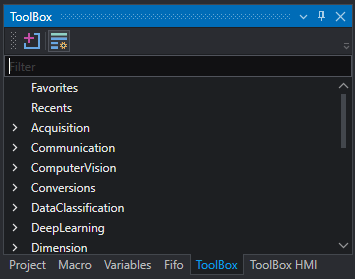
In this tab you can find the list of available tools.
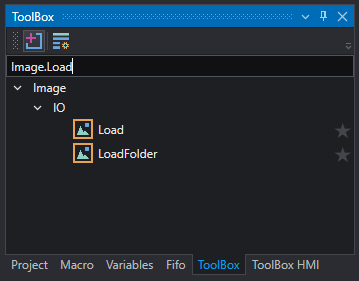
You can search for a tool by typing its name or part of it in the text box and add a new class library based on a template integrated into OEVIS®.
Tool Box HMI
For information regarding the HMI, please refer to the proper section.