Web API
REST
A RESTful API (Representational State Transfer API) is a web service that follows the principles of REST architecture to allow communication between systems over the internet, typically using HTTP.
Key Characteristics of RESTful APIs:
- Stateless: Each request from a client to the server must contain all the information needed to understand and process the request. The server does not store any session information.
- Resource-Based: Everything is treated as a resource (e.g., users, products, orders), and each resource is identified by a unique URL.
- Uses Standard HTTP Methods GET, POST, PUT, DELETE.
GET: fetch data from the server.
POST: create a new resource.
PUT: update an existing resource or create it at a specific location.
DELETE: delete a resource.
For these methods, you will find in the IN properties of the tools:
Parameters (key/value):
Parameters are used to filter, sort, or specify the data being requested. In GET requests, they are usually included in the URL after a question mark (?) and separated by &.
Example:
GET /api/products?category=books&max_price=20
Meaning:
- category=books: the client is requesting only products in the "books" category.
- max_price=20: the client wants only products with a maximum price of 20.
Headers (key/value):
Headers are metadata that accompany the request and provide additional information to the server, such as content type, authentication, or client preferences.
Example:
GET /api/products HTTP/1.1
Host: example.com
Authorization: Bearer abc123
Accept: application/json
Meaning:
- Authorization: Bearer abc123: token used to authenticate the user.
- Accept: application/json: the client wants the response in JSON format.
- Content-Type: (more common in POST/PUT) indicates the format of the data being sent.
Body (key/value):
The body of a POST request contains the actual data that the client wants to send to the server. The data is accepted in OEVIS® in string format.
REST Client
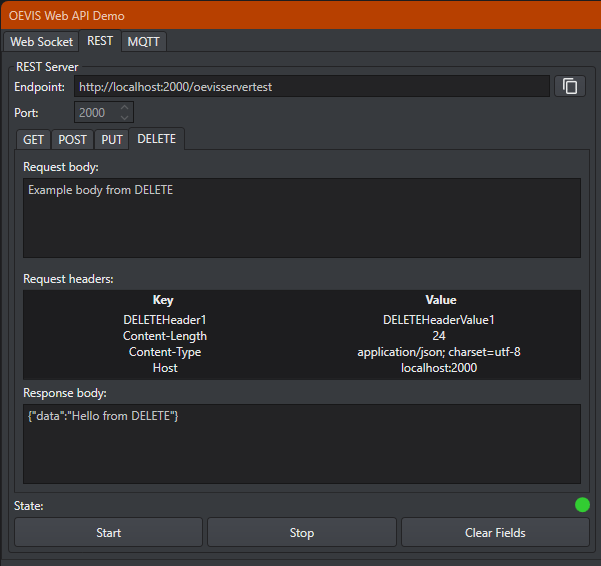
This example is designed to be used with the application OEVIS® Web API Demo, before running this example make sure to open the demo app and start the REST server.
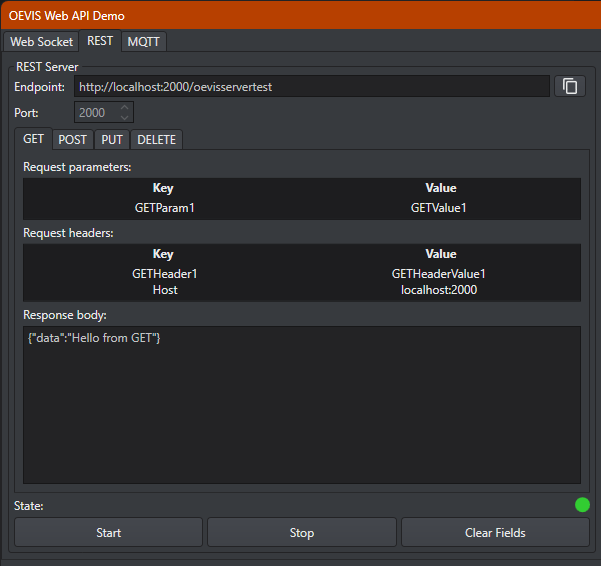
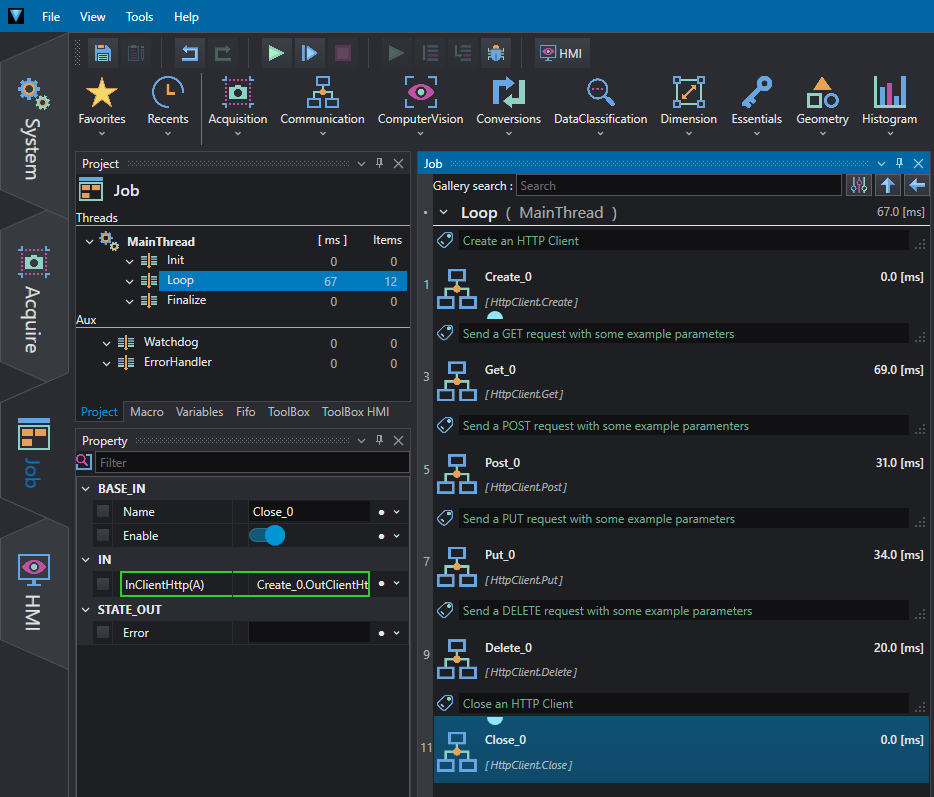
The program shows how to make simple requests to the server, each requests writes an example header, body and parameter that can be inspected into the demo app. The server responses body can be inspected from each object PropertyBar.
Inside IN Property you can find:
- InBody: see description above.
- InParameterKeys: see description above.
- InParameterValues: see description above.
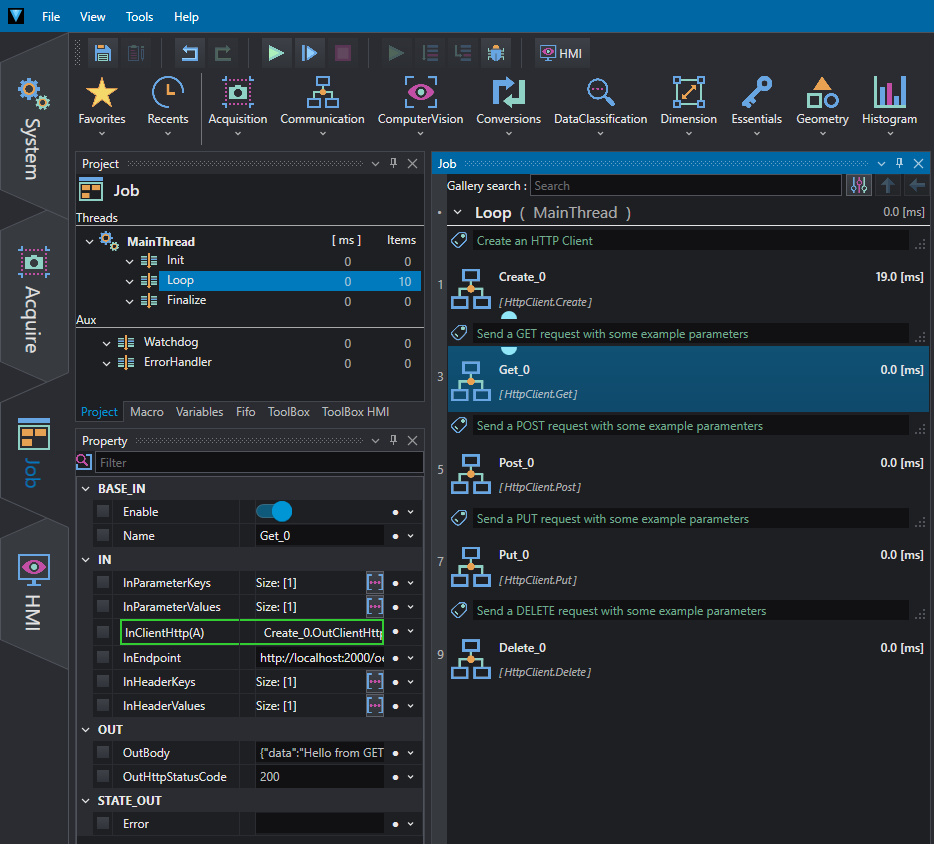
- InClientHttp: the name of the Http client assigned with the Create plus .OutClientHttp, usually linked automatically (e.g. Create_0.OutClientHttp).
- InEndpoint: server end point, for Demo App use
http://localhost:2000/oevisservertest. - InHeaderKeys: see description above.
- InHeaderValues: see description above.
Inside OUT Property you can find:
- OutBody: answer from server.
- OutHttpStatusCode: status code of request.
Within the example you can observe the instructions:
Create: create an HTTP client.
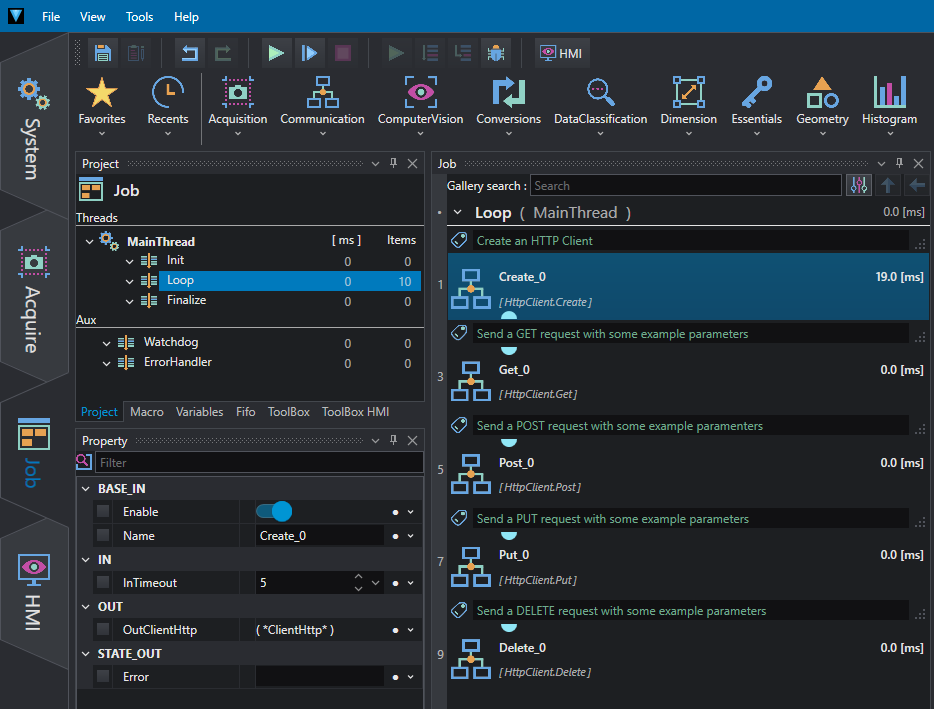
Get: send a GET request to server.
The server responds with a fixed text "Hello from GET":
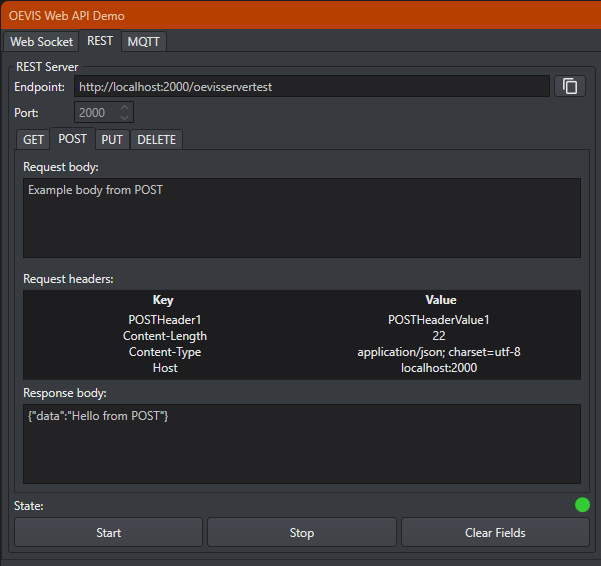
Post: send a POST request to server.
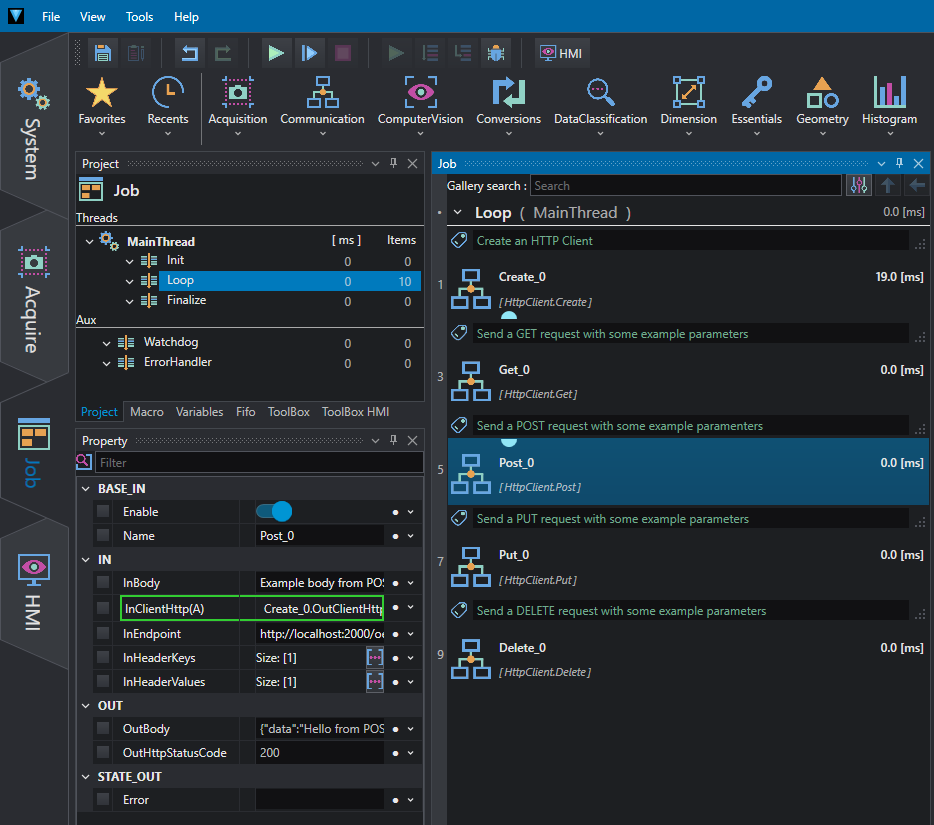
The server responds with a fixed text "Hello from POST":
Put: send a PUT request to server.
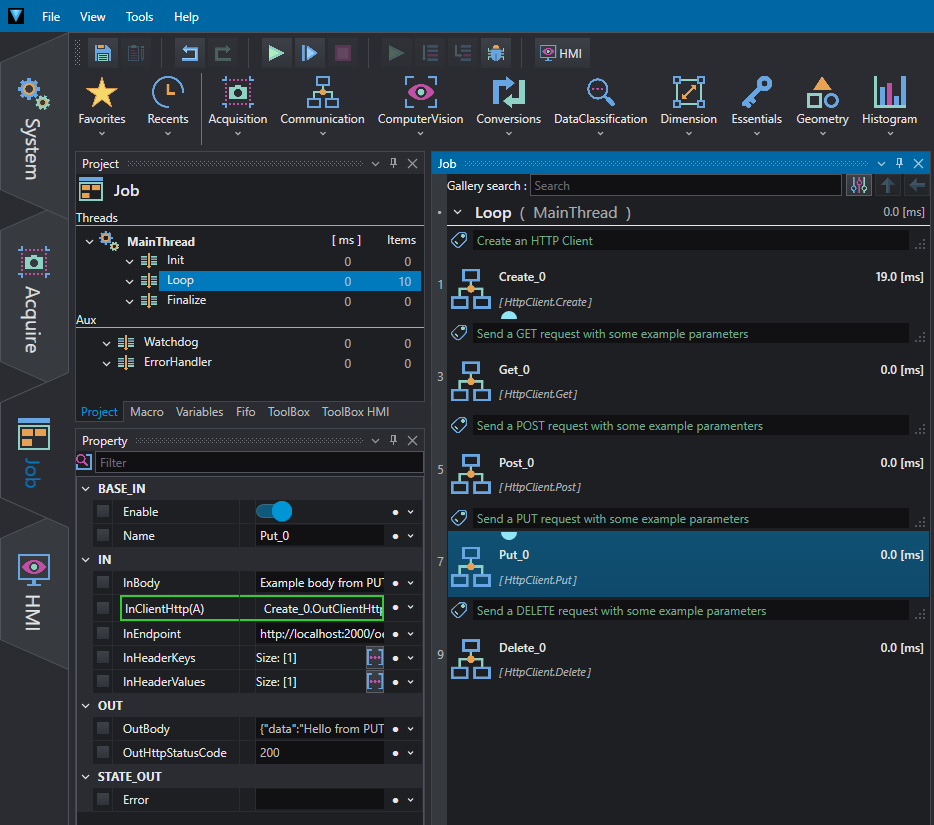
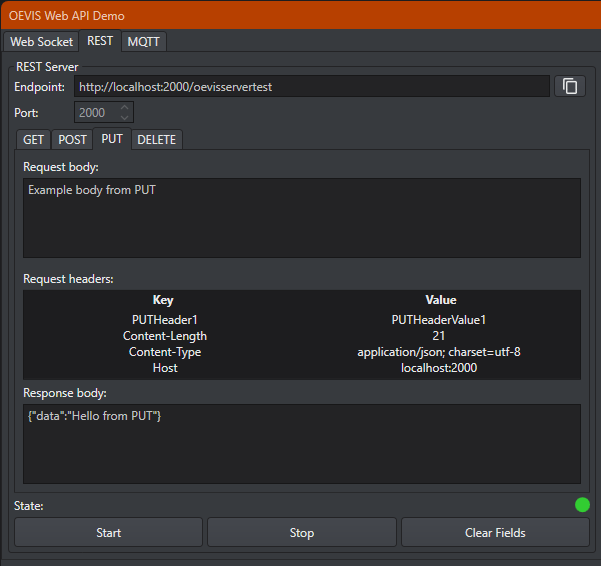
The server responds with a fixed text "Hello from PUT":
Delete: send a DELETE request to server.
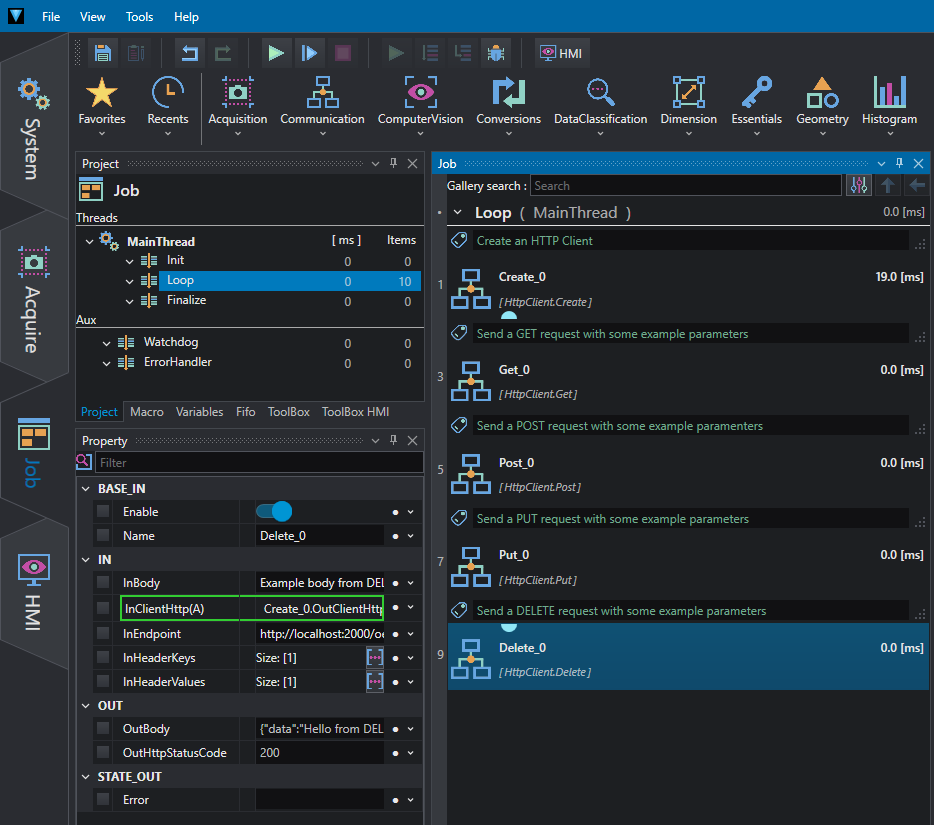
The server responds with a fixed text "Hello from DELETE":
Close: close an HTTP client.
REST Server
This example is designed to be used with the application OEVIS® Web API Demo, before running this example make sure to open the Demo App.
When this program runs it starts the server and reads the state of the two example variables from the server; by using the demo app it is possible to read the state of those variable with the GET method in the REST client section. When a value is read it is possible to modify it and send back by using the PUT section; the modified values can be read by running another time this project.
As first thing, the project declares an Http server in System.
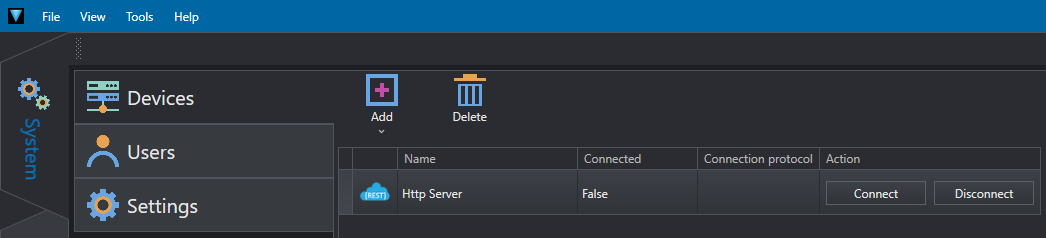
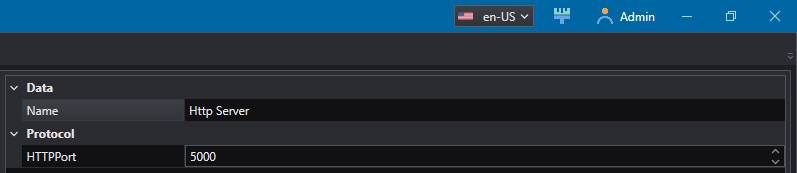
The server exposes two variables that can be read/write from external clients. For those variable only name and type can be edited.

For more details you can see the modes of operation in System.
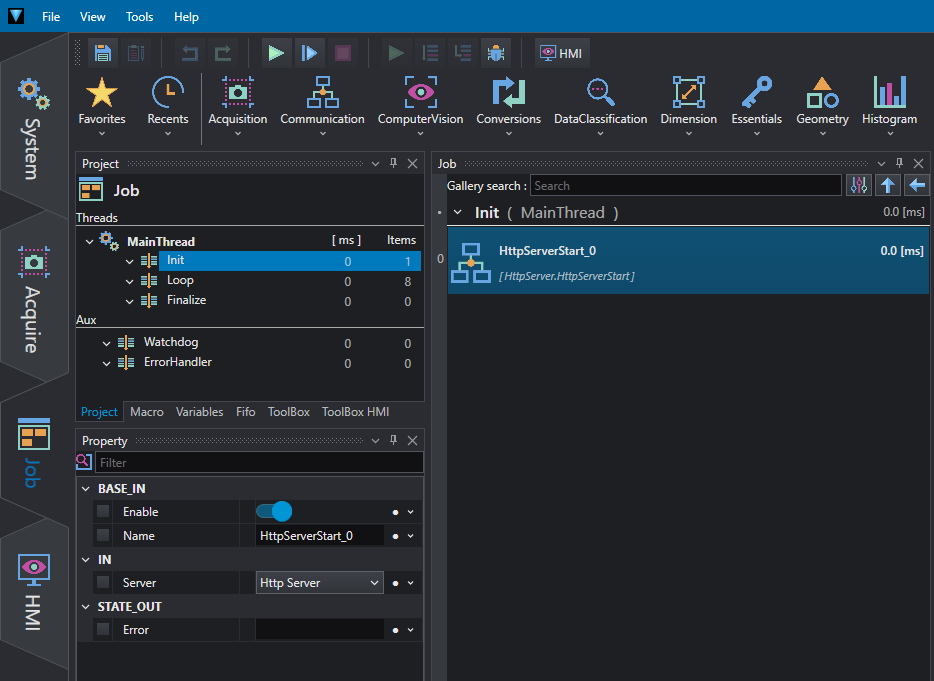
In the Job section the server is started in Init. It is important that the start instruction is in Init especially if the loop is to be repeated several times, to prevent the server from being started repeatedly.
In the Loop section we find two write instructions, one for each value in the variables exposed by the server and two instructions for reading them.
Inside IN Property you can find:
- Server: server name as stated in System.
- InID: ID of the variable as stated in System.
- InValue: variable value (write tools).
Inside OUT Property you can find:
- OutValue: variable value (read tools).
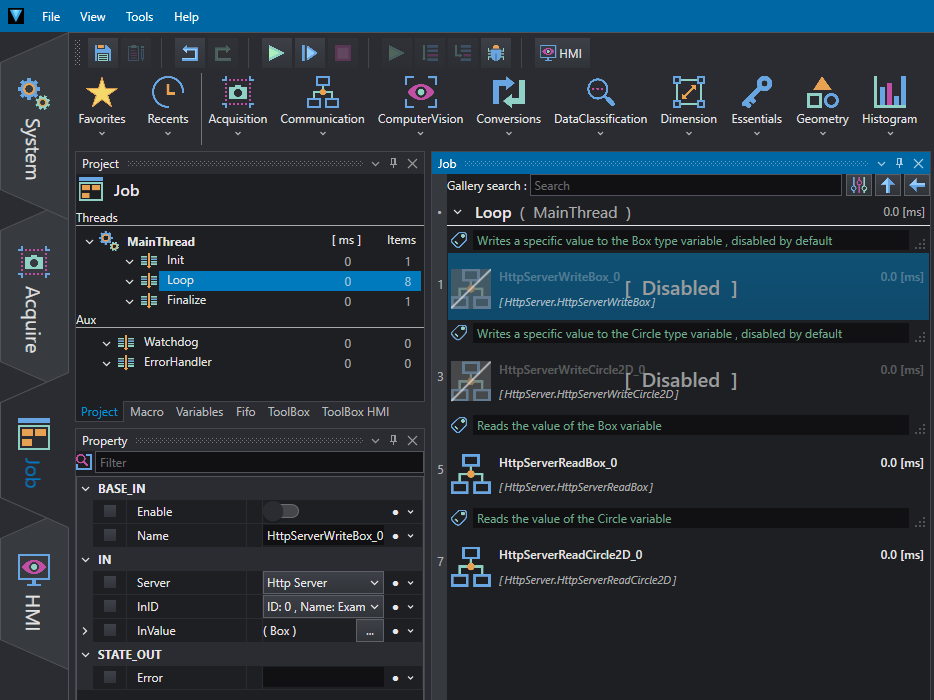
The write instructions can be enabled (Enable in the Properties or mouse right-click) to insert test values in a Run Once loop and then disabled again.
Using the read instructions, the contents of variables can also be read in Run mode.
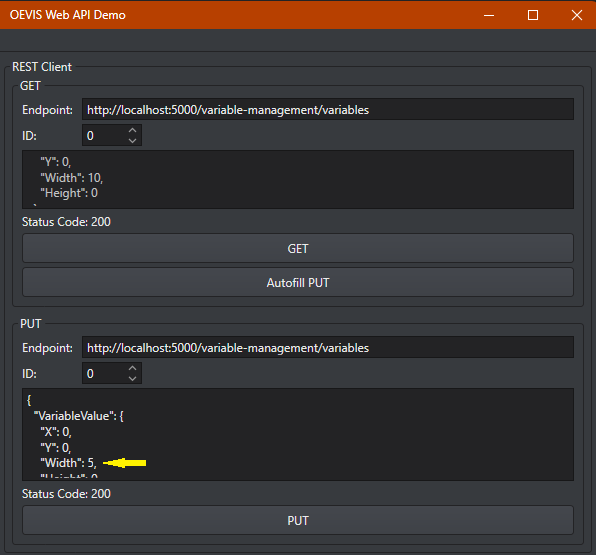
Thanks to the Demo App, in the REST Client sections, you can read the variables by selecting the ID with the button that calls the GET method.
Autofill PUT automatically completes the PUT method, you can change the value of the variable and then press the button that calls the PUT method to publish it to the server.
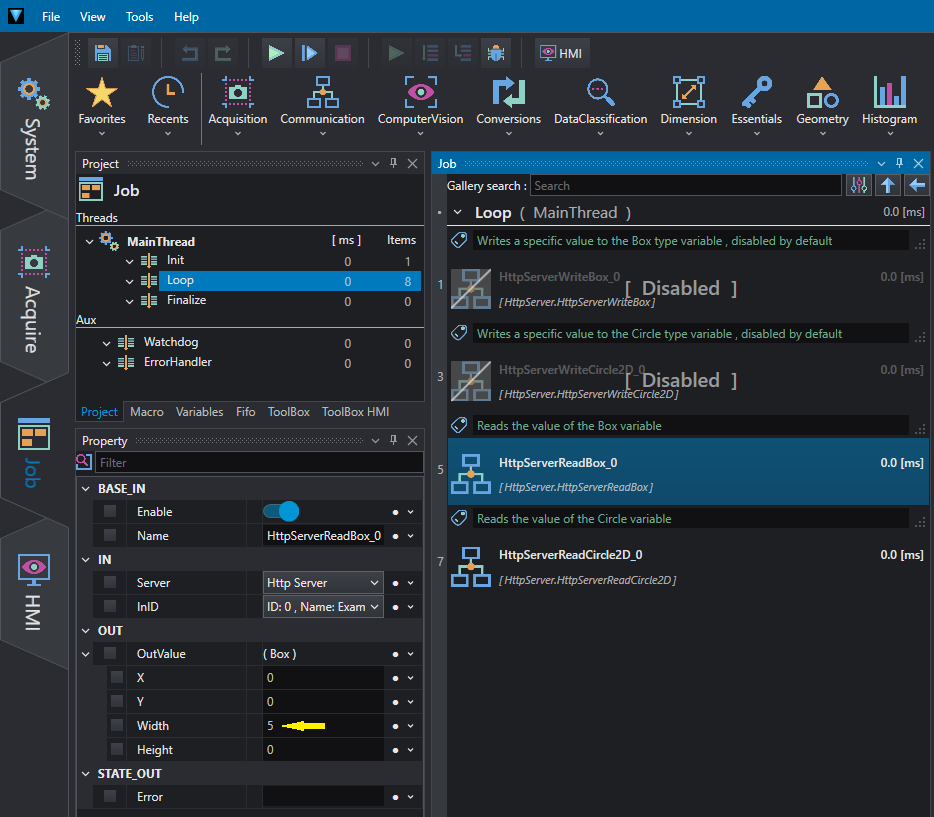
In OEVIS® check the result of the read statement of the variable with the same ID to see the new value.
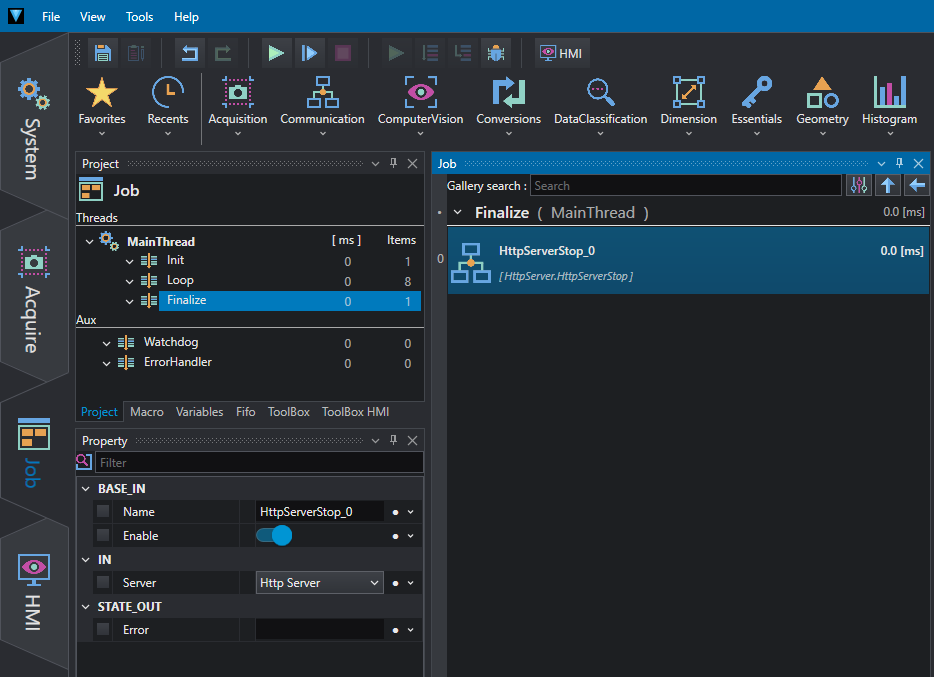
For the same reason as start, the server stop is in the Finalize section.
Web Socket
This example is designed to be used with the application OEVIS Web API Demo, before running this example make sure to open the demo app, start the Web Socket server and load an image from file.
This program shows how to work with the WebSocketClient objects in order to connect to a server, send a specific command to get an encoded image, read the response and decode the requested image.
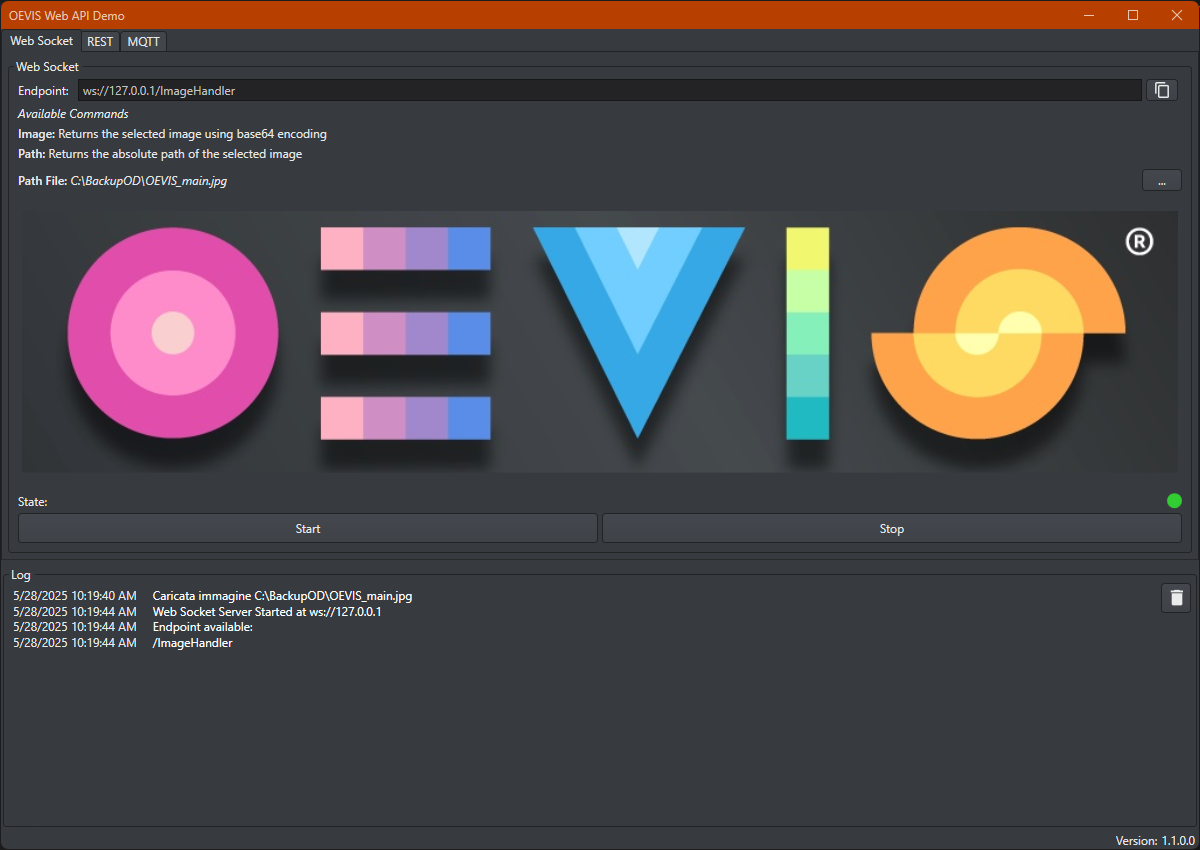
After loading the image and starting the server open the example project in OEVIS® and with Run Once you will receive the image from the server in the Visualizer.
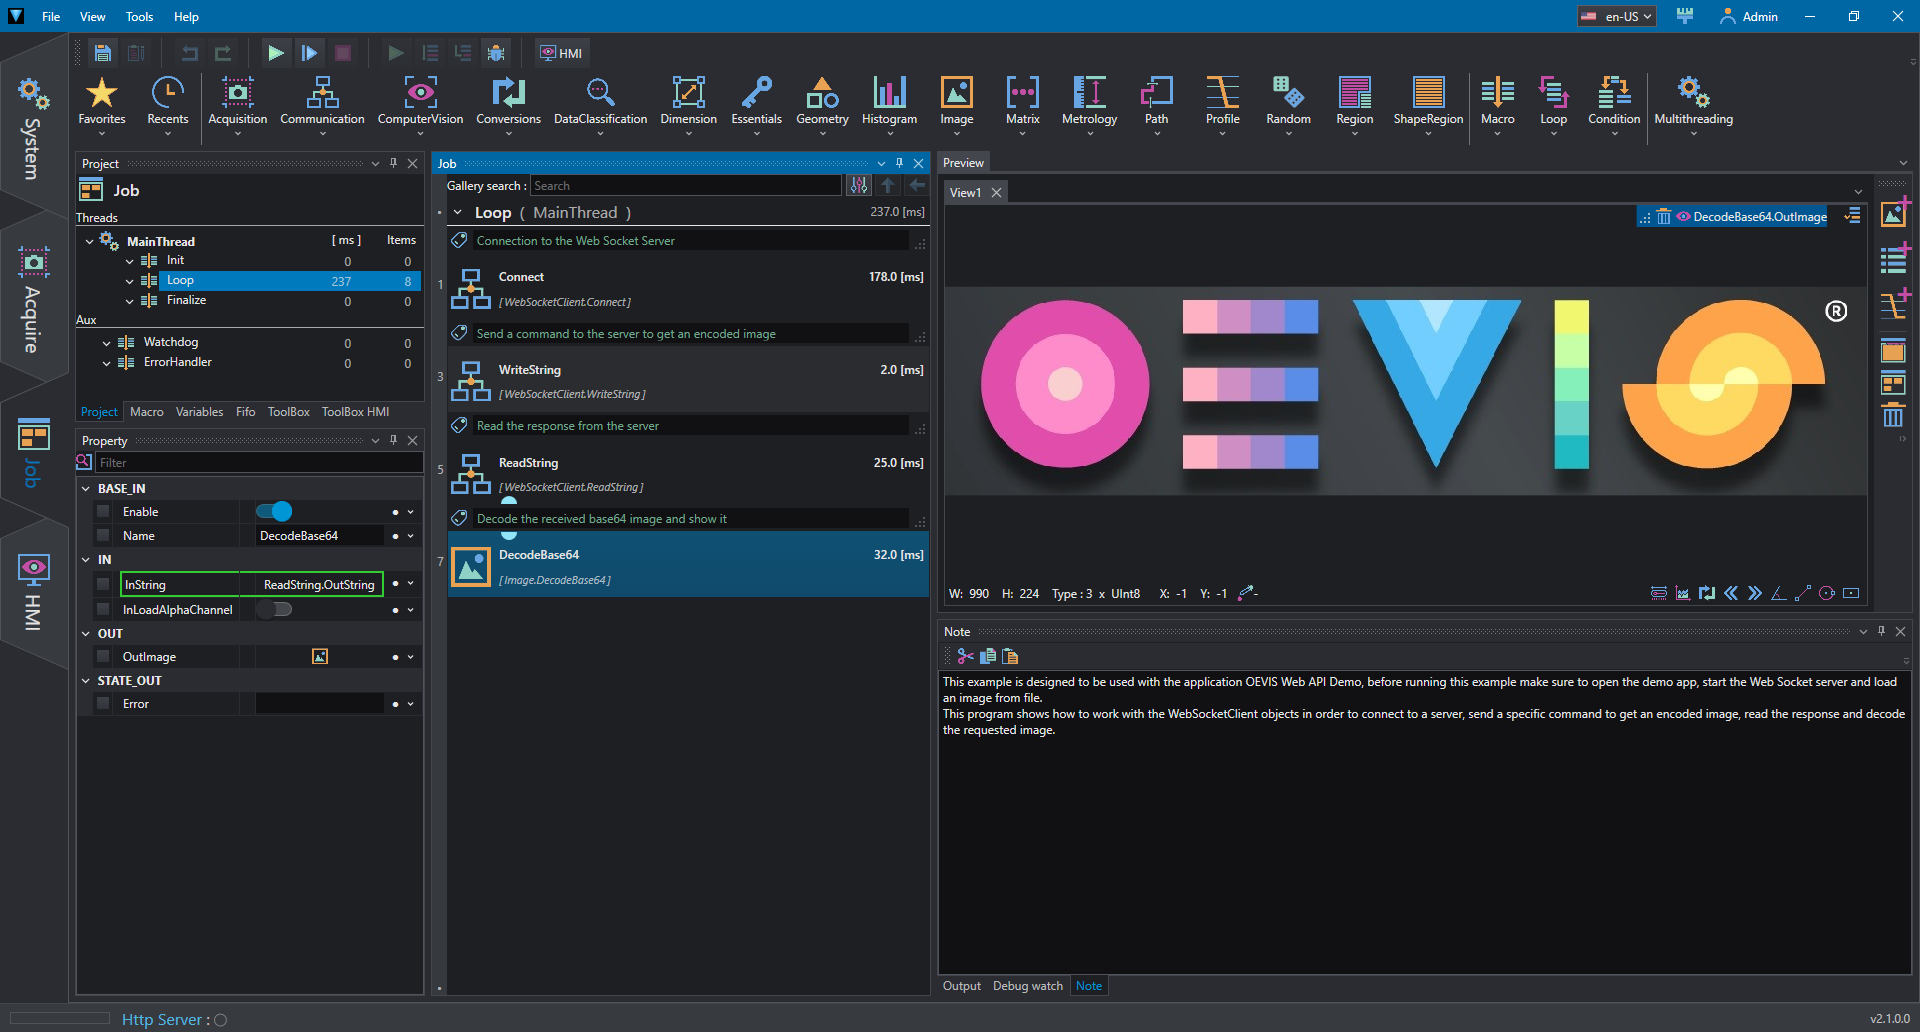
The example uses four tools (with the most important properties):
Connect
Connects the server.
IN Property:
- InURL: url of web server.
WriteString
Sends the request to receive image/path.
IN Property:
- InWebSocketClient: automatically linked to Connect OUT.
- InString: use Image to request an image, Path return the absolute path of the selected image.
ReadString
Reads the data received from the server.
IN Property:
- InWebSocketClient: automatically linked to Connect OUT.
OUT Property:
- OutString: data received from the server, in the case of the Demo App these are base 64 encoded.
DecodeBase64
Decodes the data and displays the image.
IN Property:
- InString: automatically linked to ReadString OUT.