Data classification
This example shows how to prepare a dataset starting from a folder of images, train a data classification model with it and predict the class of some test samples. The dataset preparation and the train of one model is performed in the Init task, while predictions are all performed in the Loop one. A simple HMI has been prepared to show the single predictions in continous run.
Init
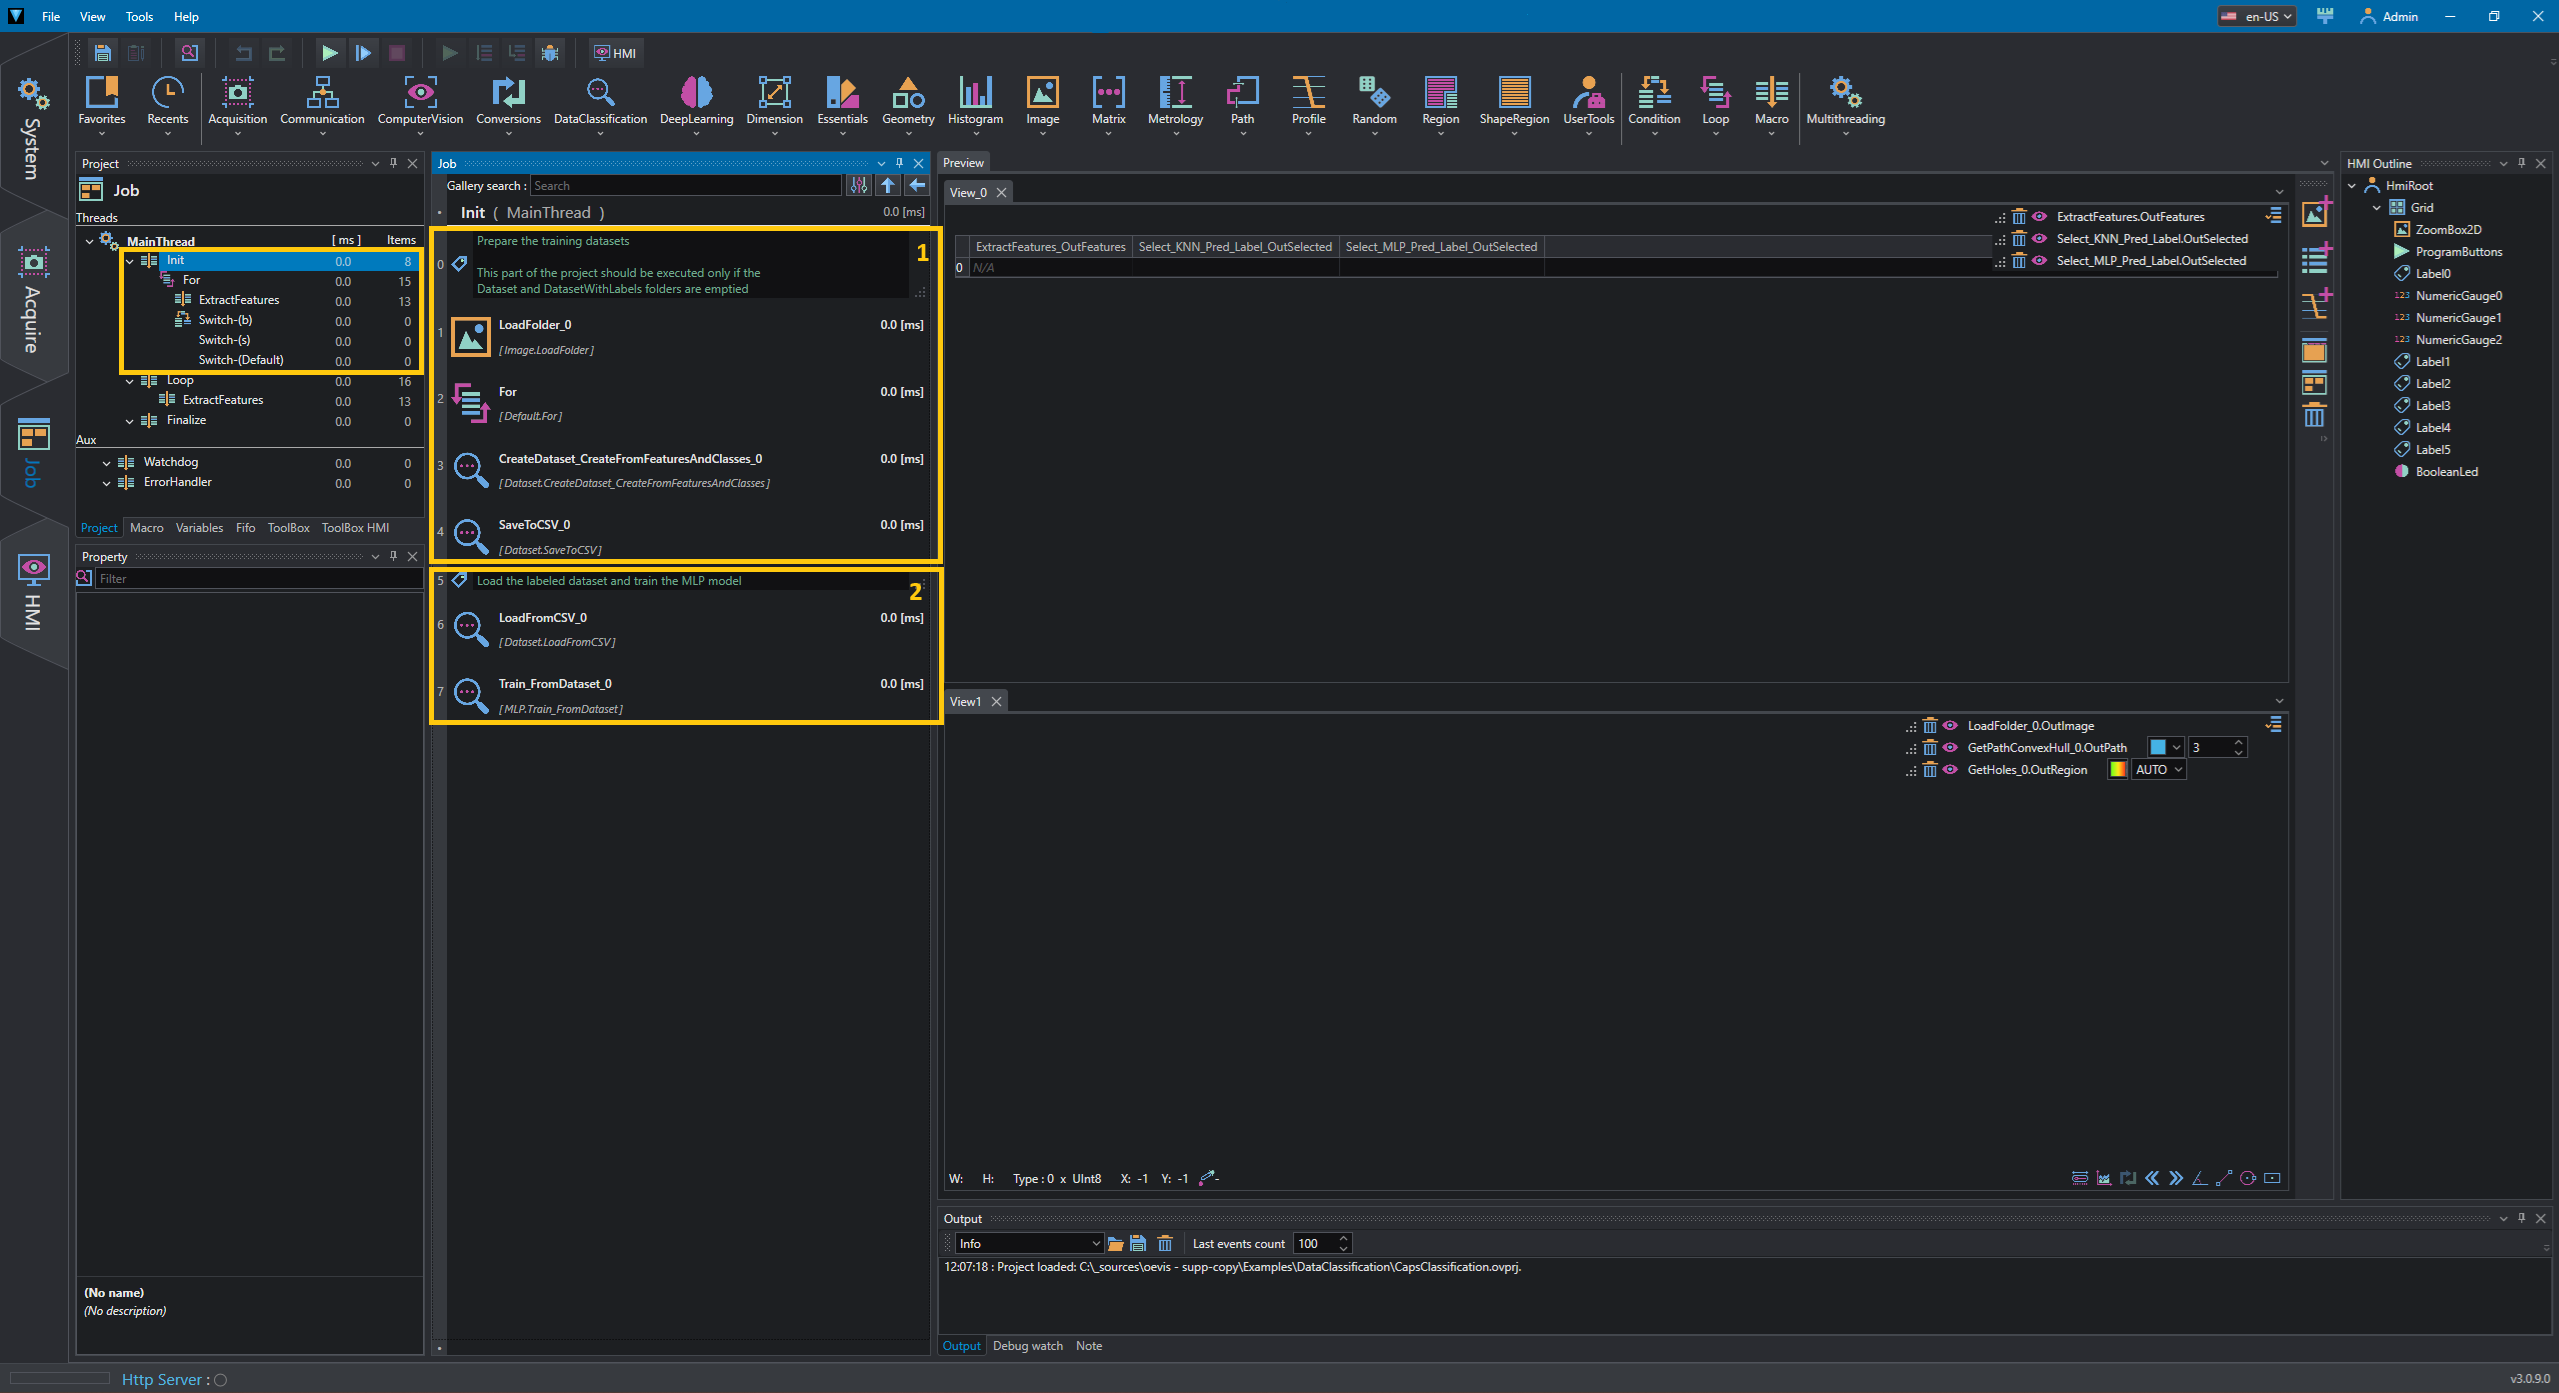
In the Init task two groups of tools can be found:
- The preparation of the datasets (1)
- The train of the MLP model (2)
Dataset preparation
Warning
By default, all these tools are disabled! They are present (and enabled in the images) to explain the workflow, but must be used only once: when the datasets need to be created (or the folders where they are saved are emptied).
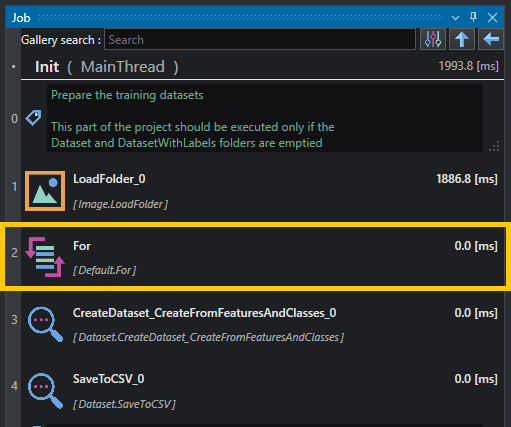
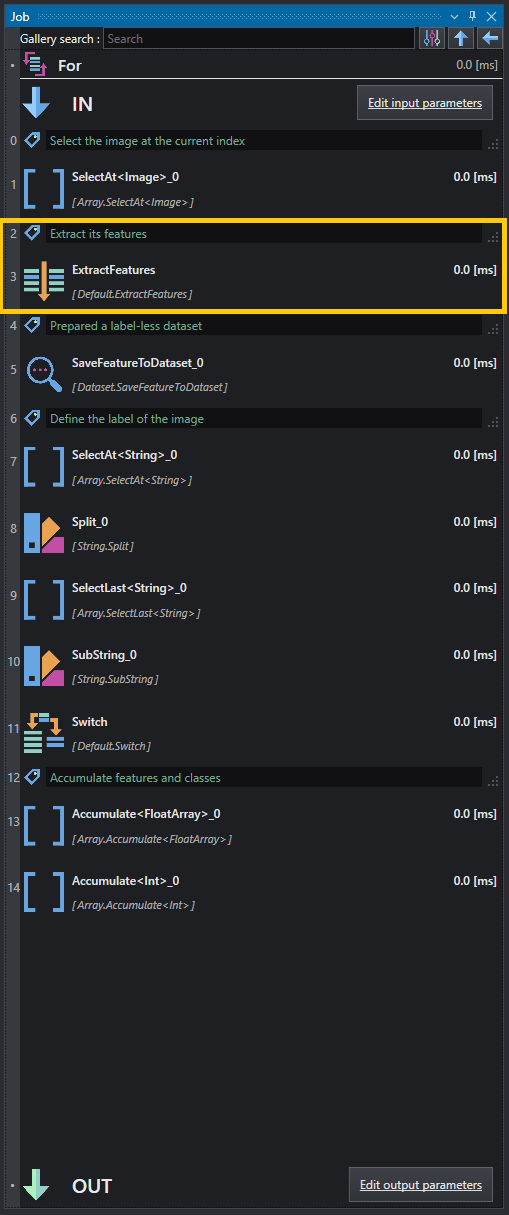
Through LoadFolder, the list of all the files' name and images are loaded and transfered to the For. Inside of it, the features extraction and the labelization of the images is performed, and the results of each iterations are saved in the two Accumulates. The so accumulated informations are then transfered to CreateDataset_CreateFromFeaturesAndClasses to generate the labeled dataset that is saved in a CSV file using SaveToCSV.
Also, inside the For, a label-less dataset is prepared using SaveFeatureToDataset (that will be used for the KNN train through the dedicated editor).
Features extraction
Inside this Macro, all the features required to train (or perform predictions with) the classification models are extracted from an image.
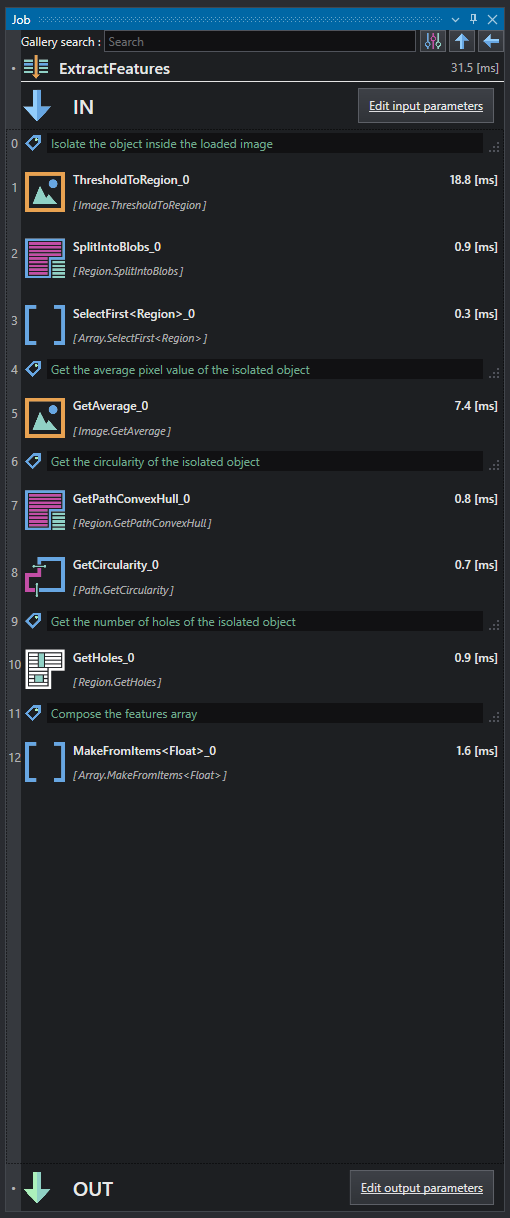
Through ThresholdToRegion, only the pixels with a maximum value of 160 are considered. Then using SplitIntoBlobs, with a minimum area requirement of 10000, only the main object is found in its output list, from which is selected to avoid the useless vectorization of the following tools.
From this region, three features are extracted: - Average Pixel Value: using GetAverage on the isolated region of the loaded image, the average value of the pixels in gray scale is calculated - Circularity: by first getting the convex hull through GetPathConvexHull, the circularity can be calculated with GetCircularity - Number of Holes: using GetHoles, the number of holes of the reagion can be calculated
A single array of floats, using MakeFromItems is created.
MLP train
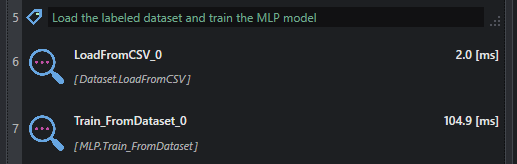
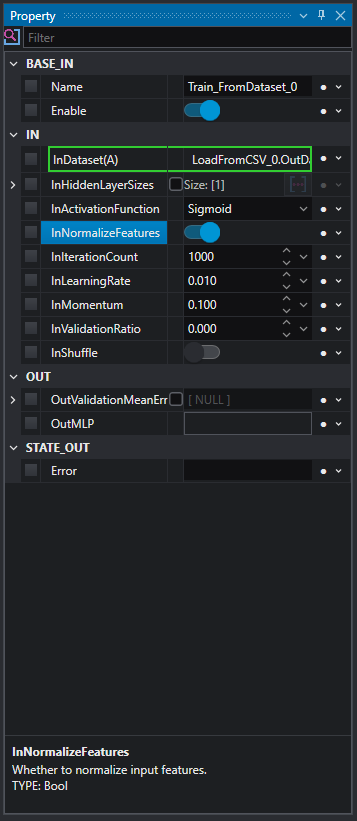
By reloading the labeled dataset with LoadFromCSV, the train of the MLP model can be perform with Train_FromDataset.
Note
Remeber to adjust the parameter of the model to make it fit at best.
Loop
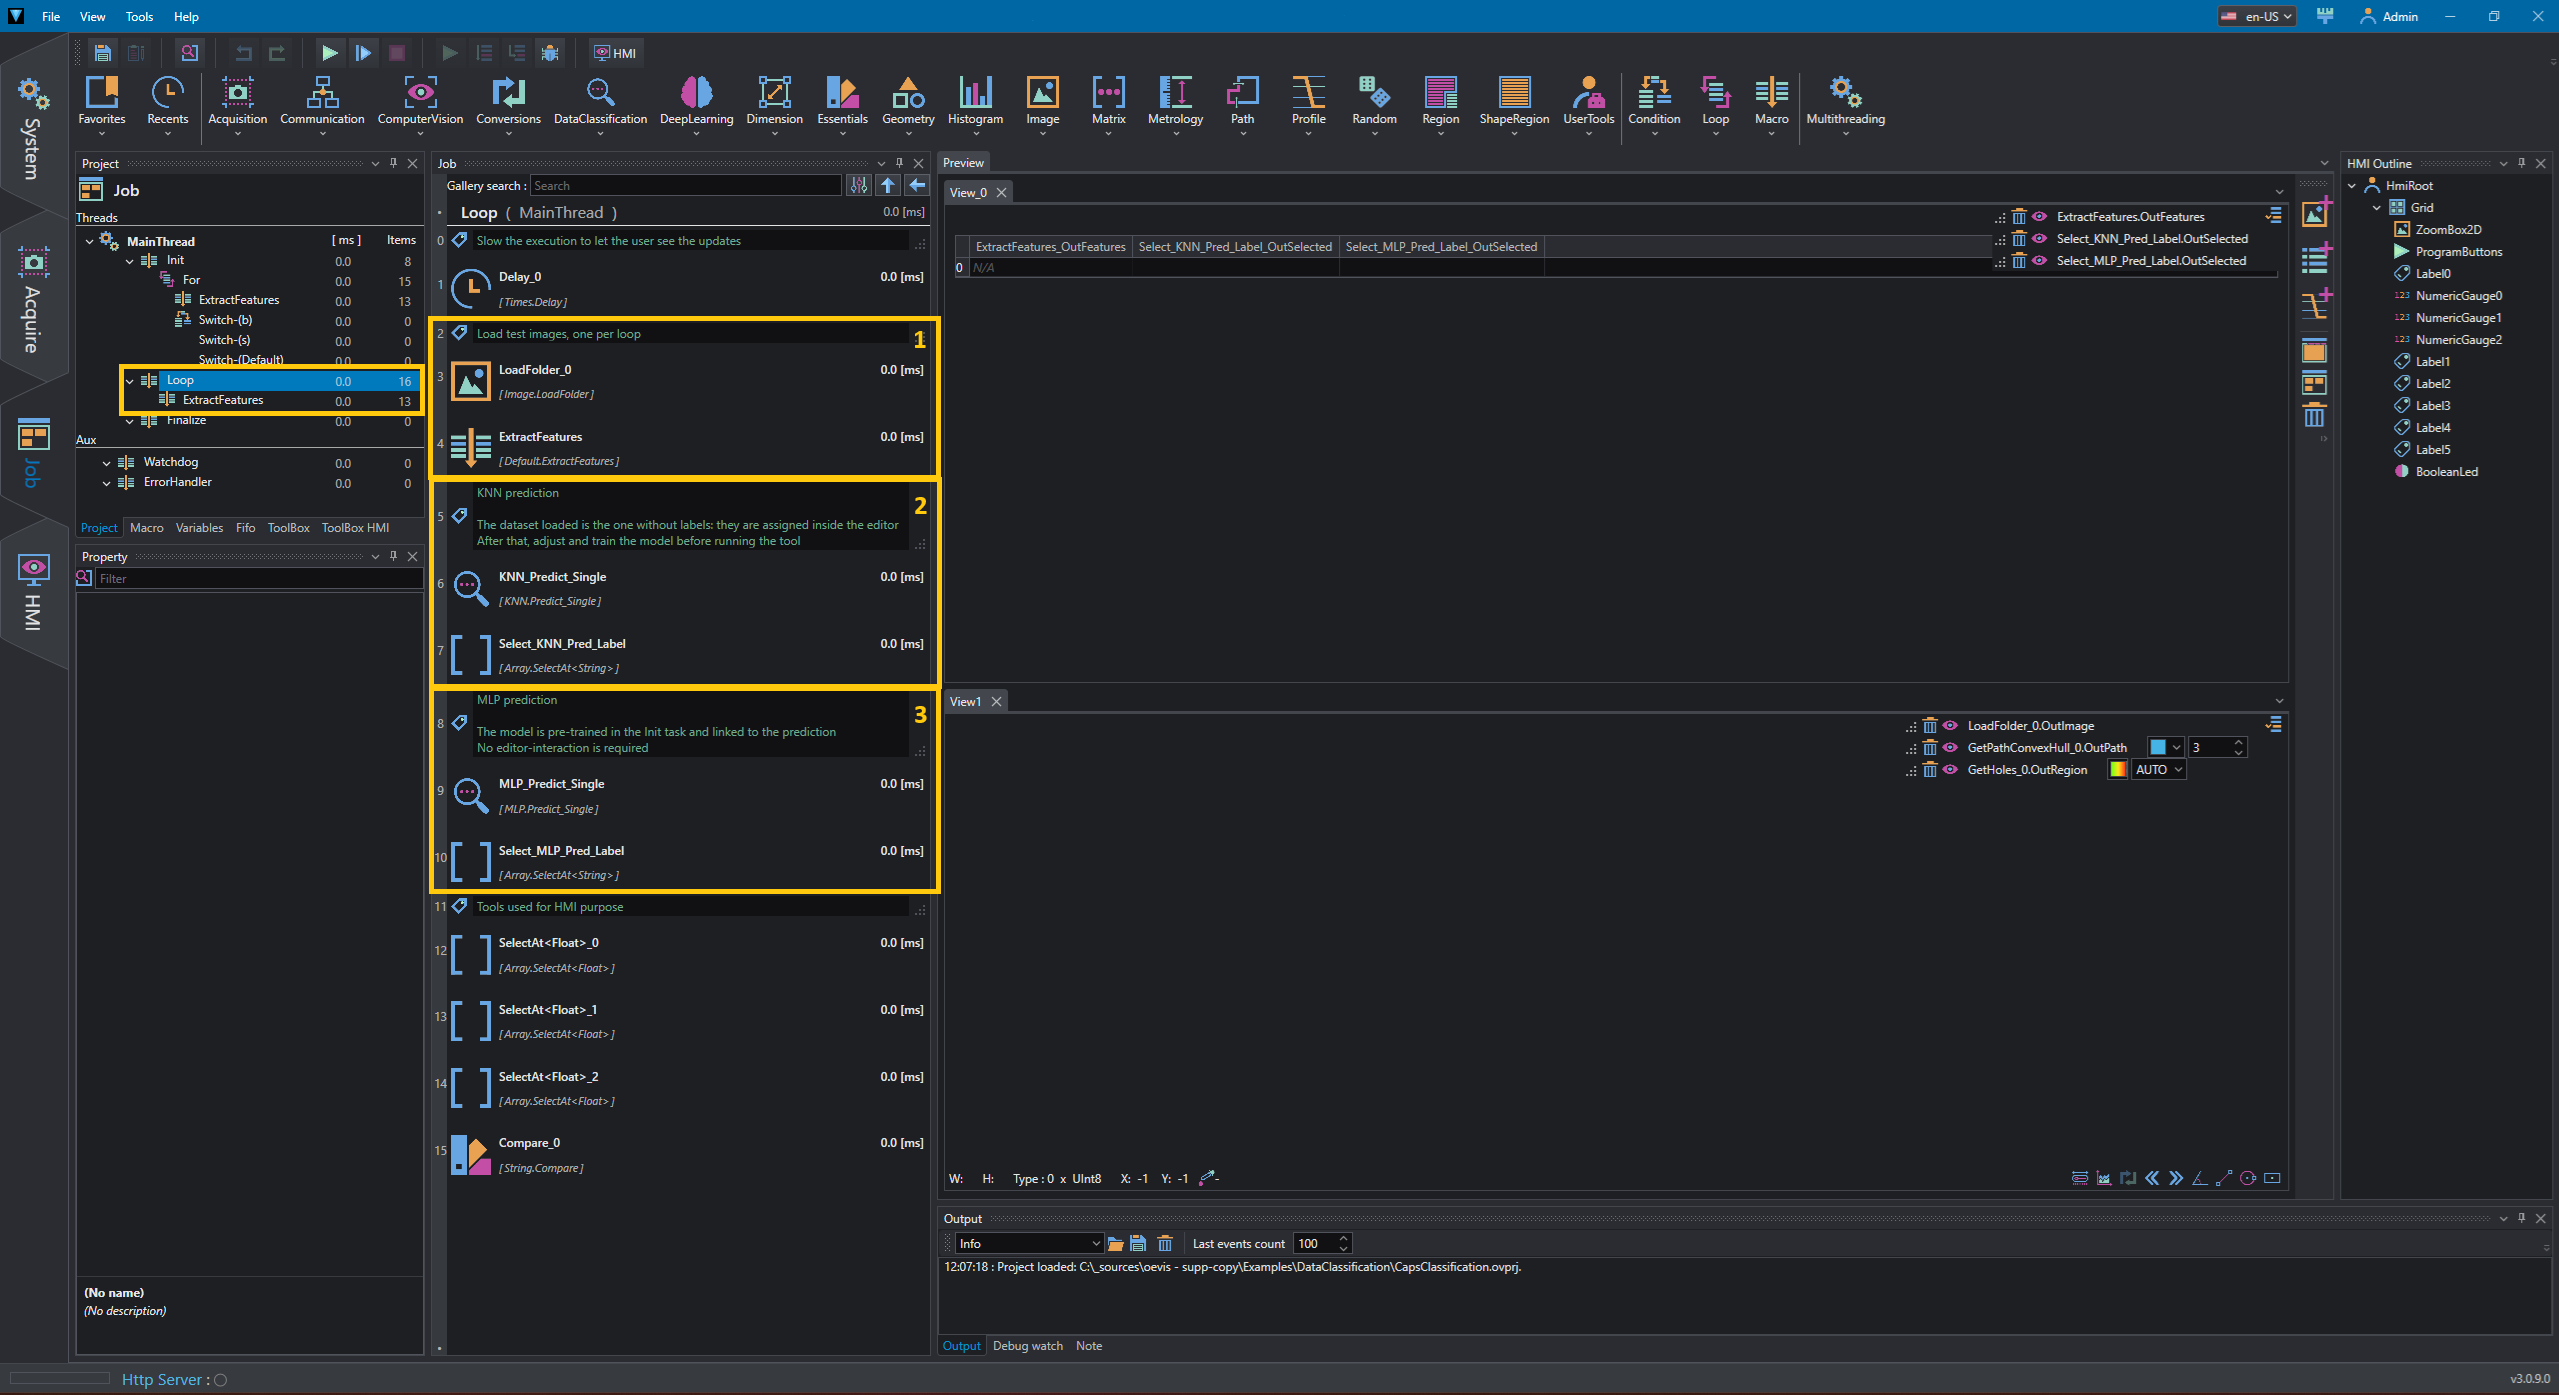
In the Loop task mainly three groups of tools can be found:
- The preparation of the test image (1)
- The prediction of the KNN (2)
- The prediction of the MLP (3)
Test image preparation
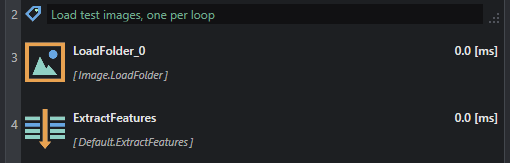
Using LoadFolder, at each iteration of the loop a different image from the test folder is loaded and then, through the features extraction, it is prepared for the inference of the models.
KNN train and prediction
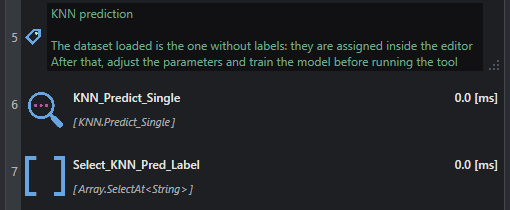
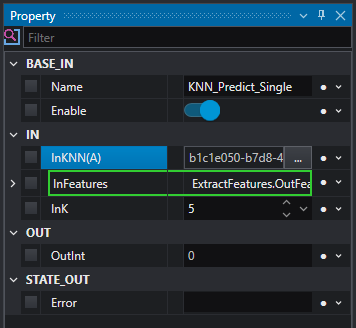
Unlinke the MLP model, the KNN is not trained yet. To do so, we can use the model editor, that will be opened by clicking on the button near the InKNN(A) property of the property viewer of the tool KNN_Predict_Single.
After that, we can perform the prediction of the label of the currently loaded image through the same tool and translate it to its string equivalent for more clarity and simplicity.
Model editor
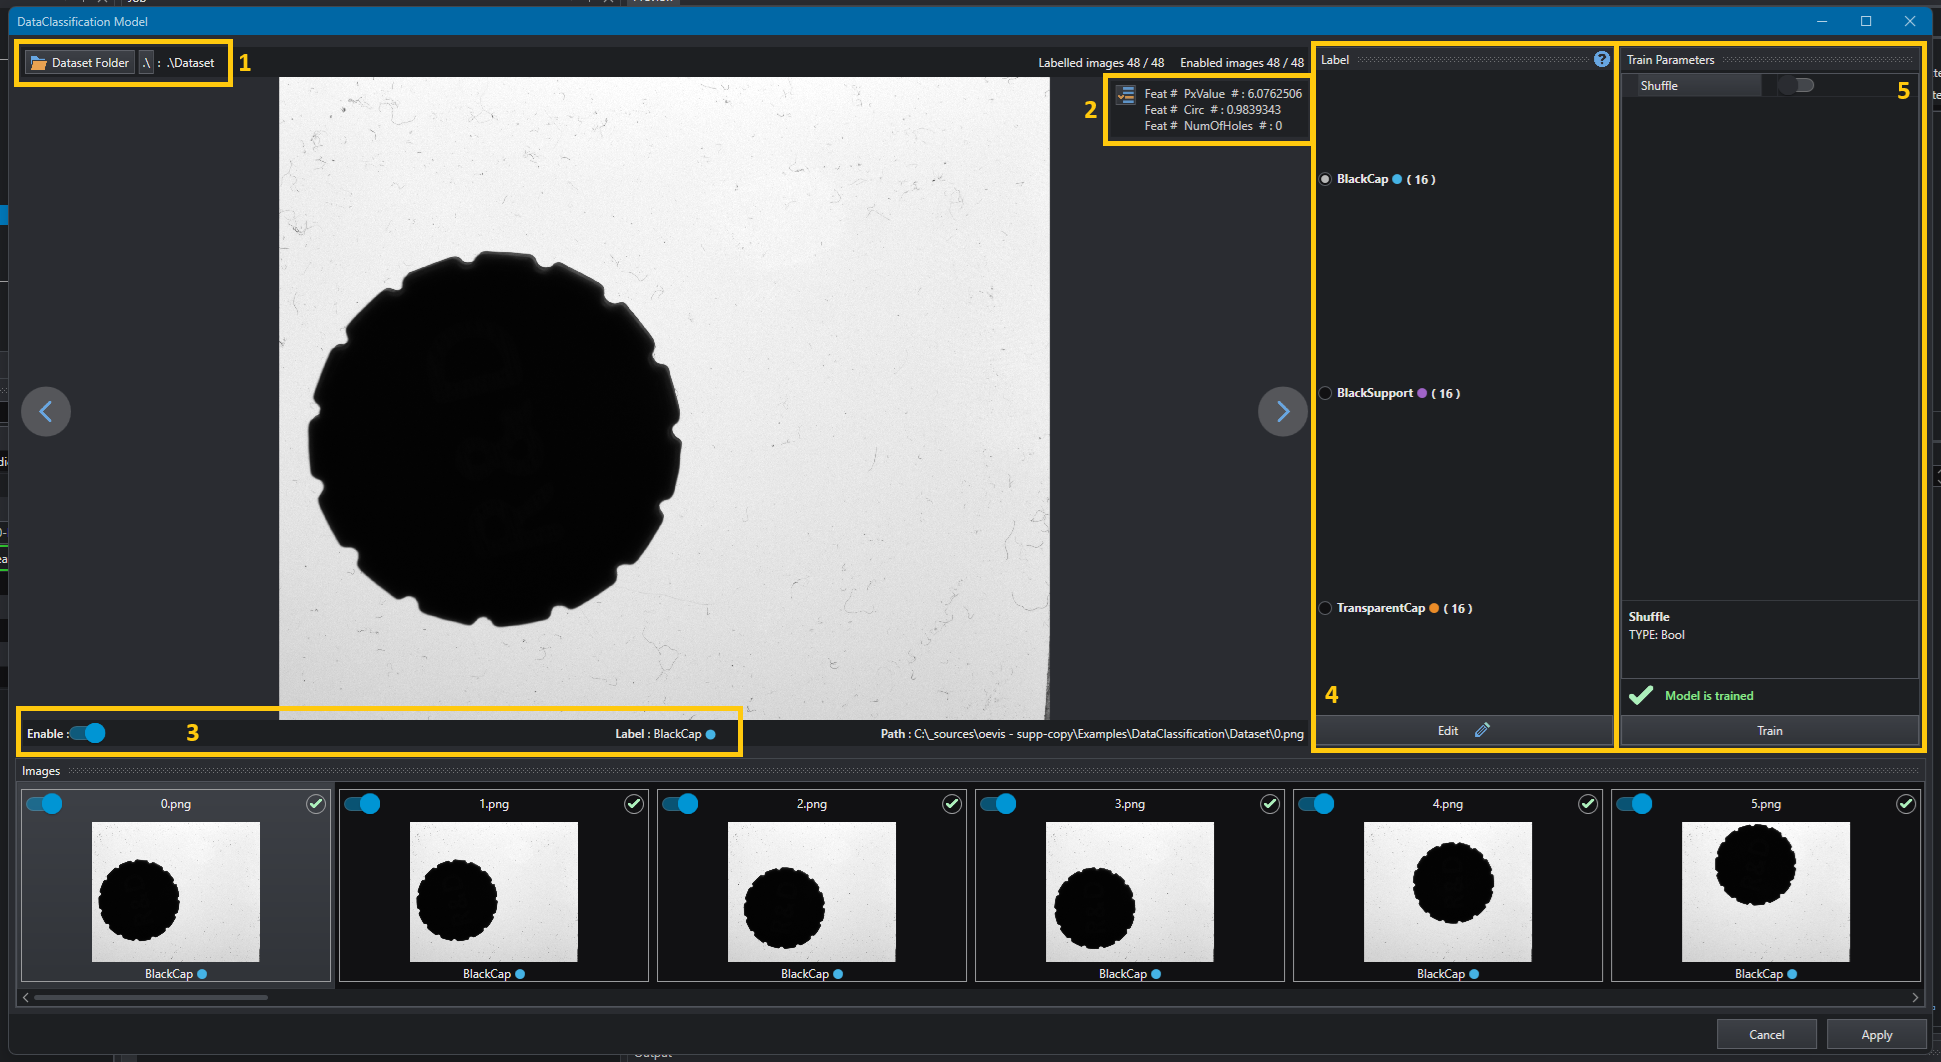
The Data Classification Model editor view allow the user to:
- load a dataset (1)
- visualize the features and the labels of each element of the dataset (2, 3)
- edit the labels and assign them to the dataset elements (4)
- adjust the model parameters and train it (in this case KNN, 5)
MLP prediction
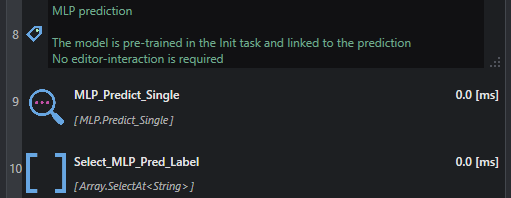
By using the pre-trained MLP model generated in the Init task, it is possible to directly make a prediction of the label to assign to the currently loaded image with MLP_Predict_Single. This will produce in output the index of the class that, for simplicity and clarity, is transformed into its string equivalent.
HMI
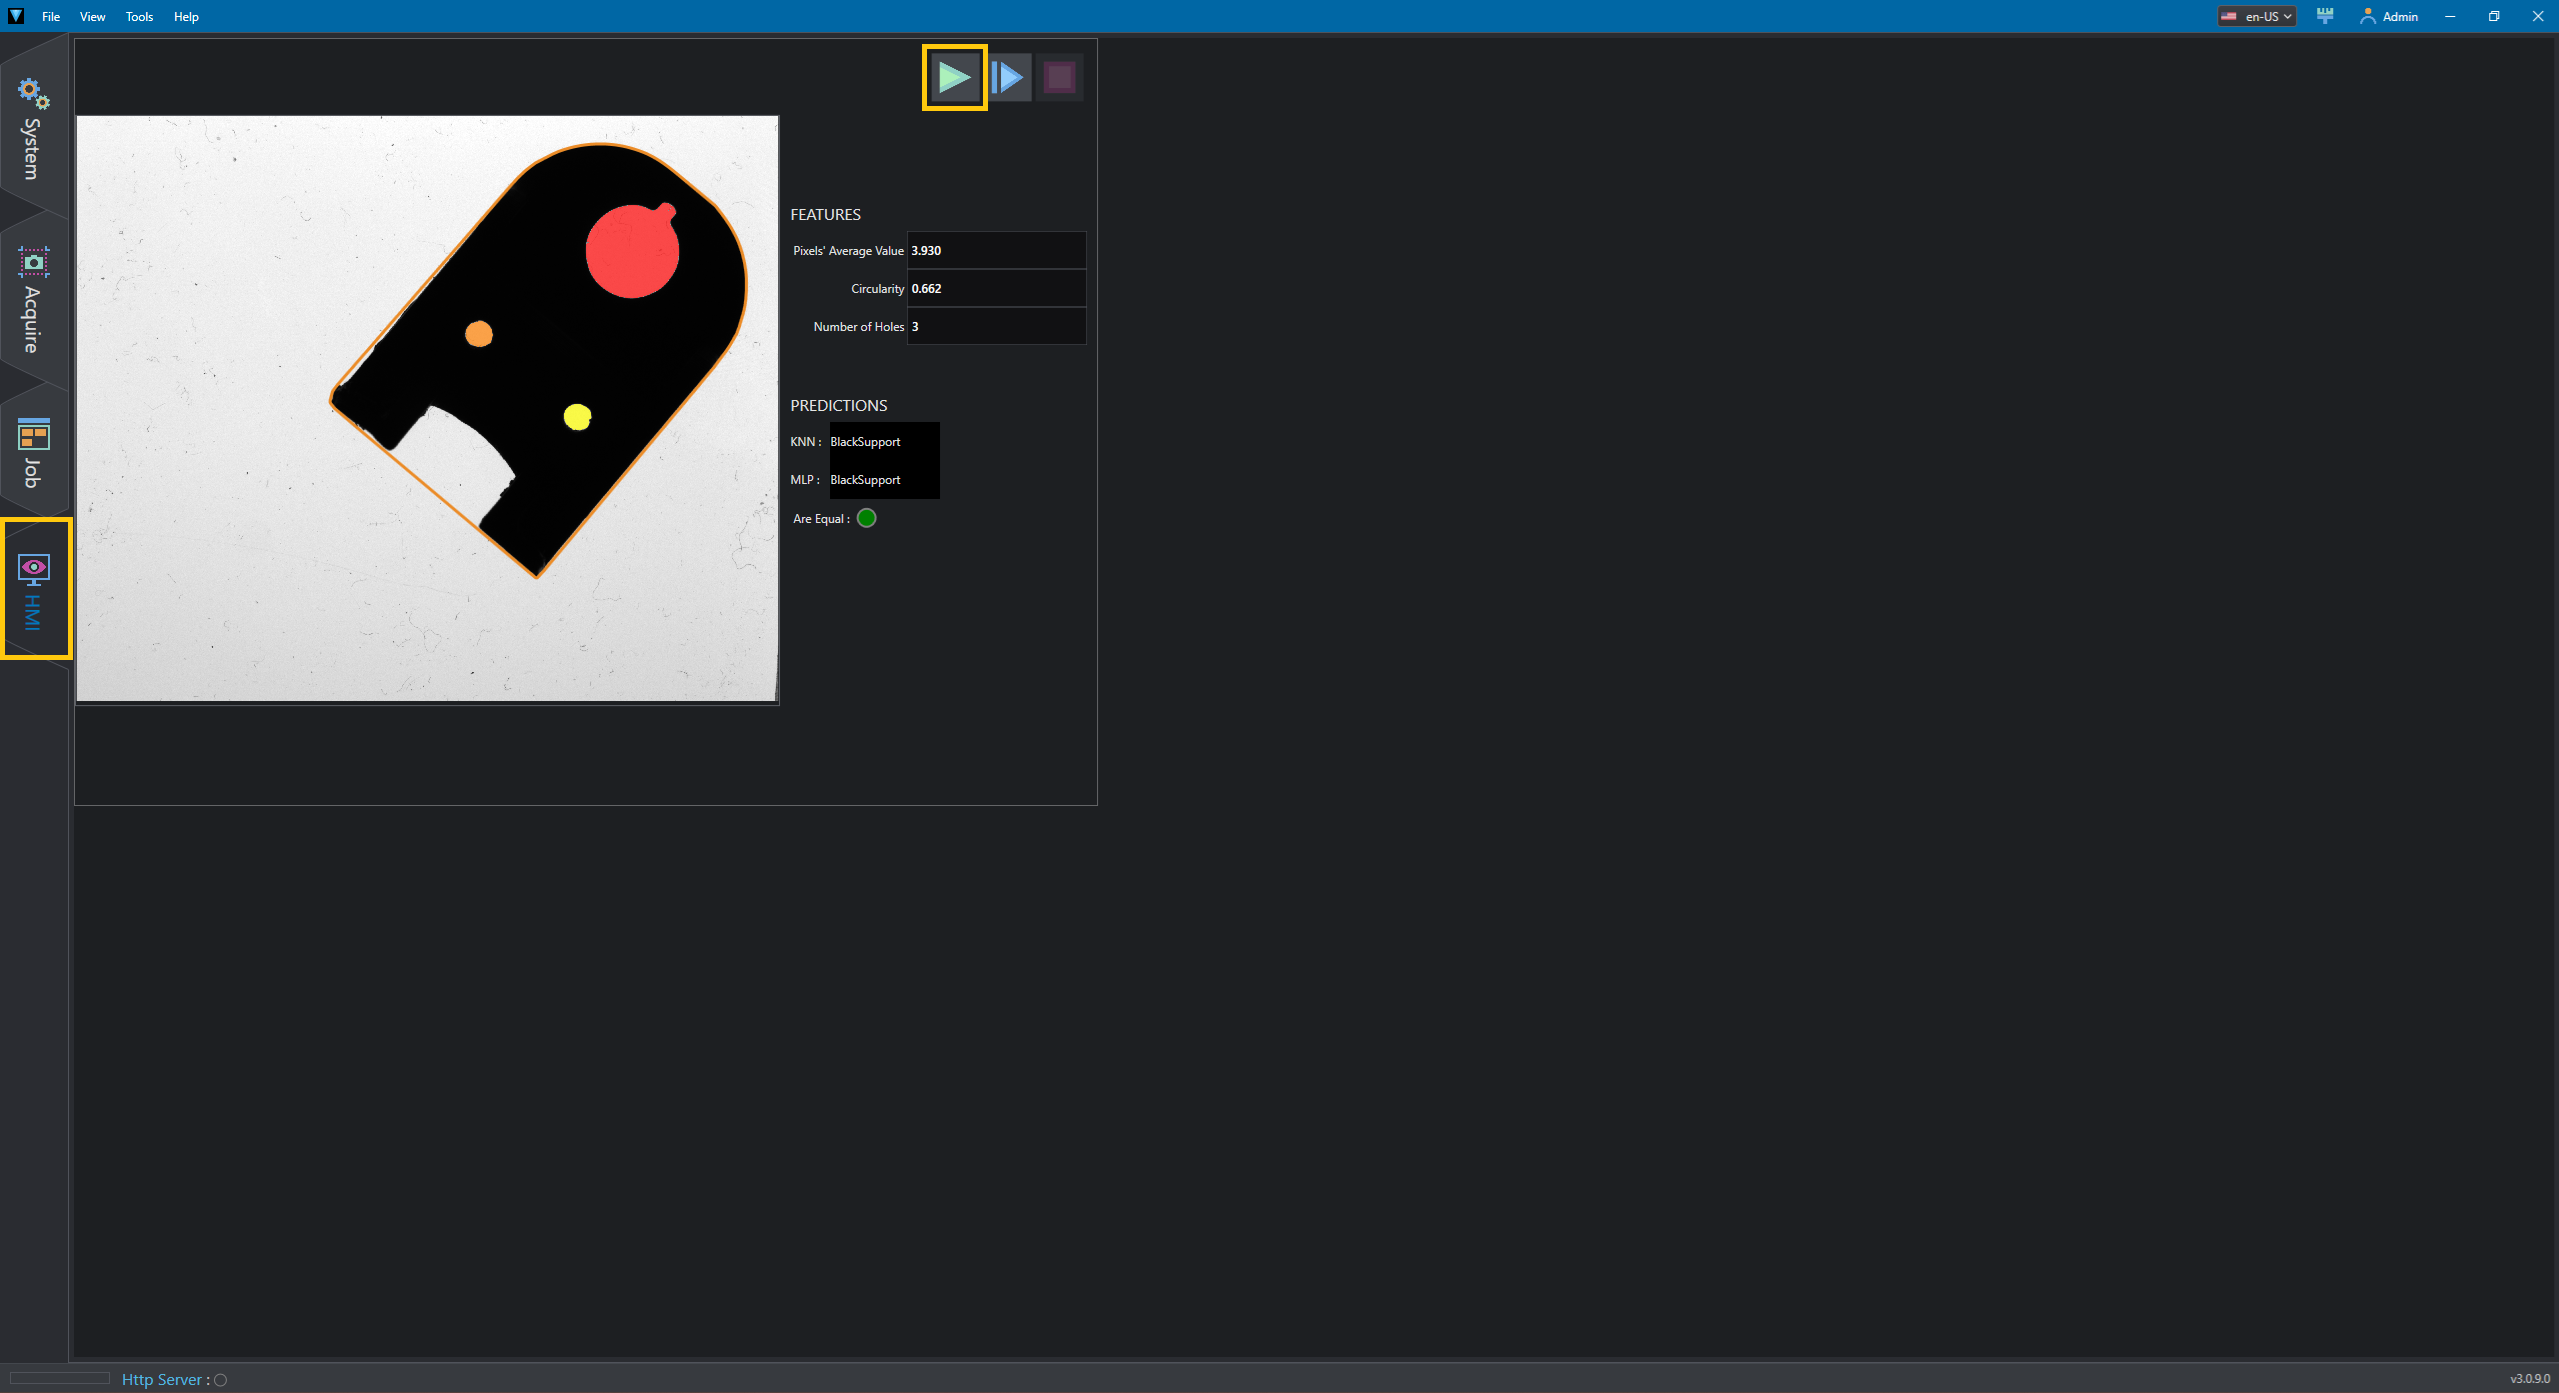
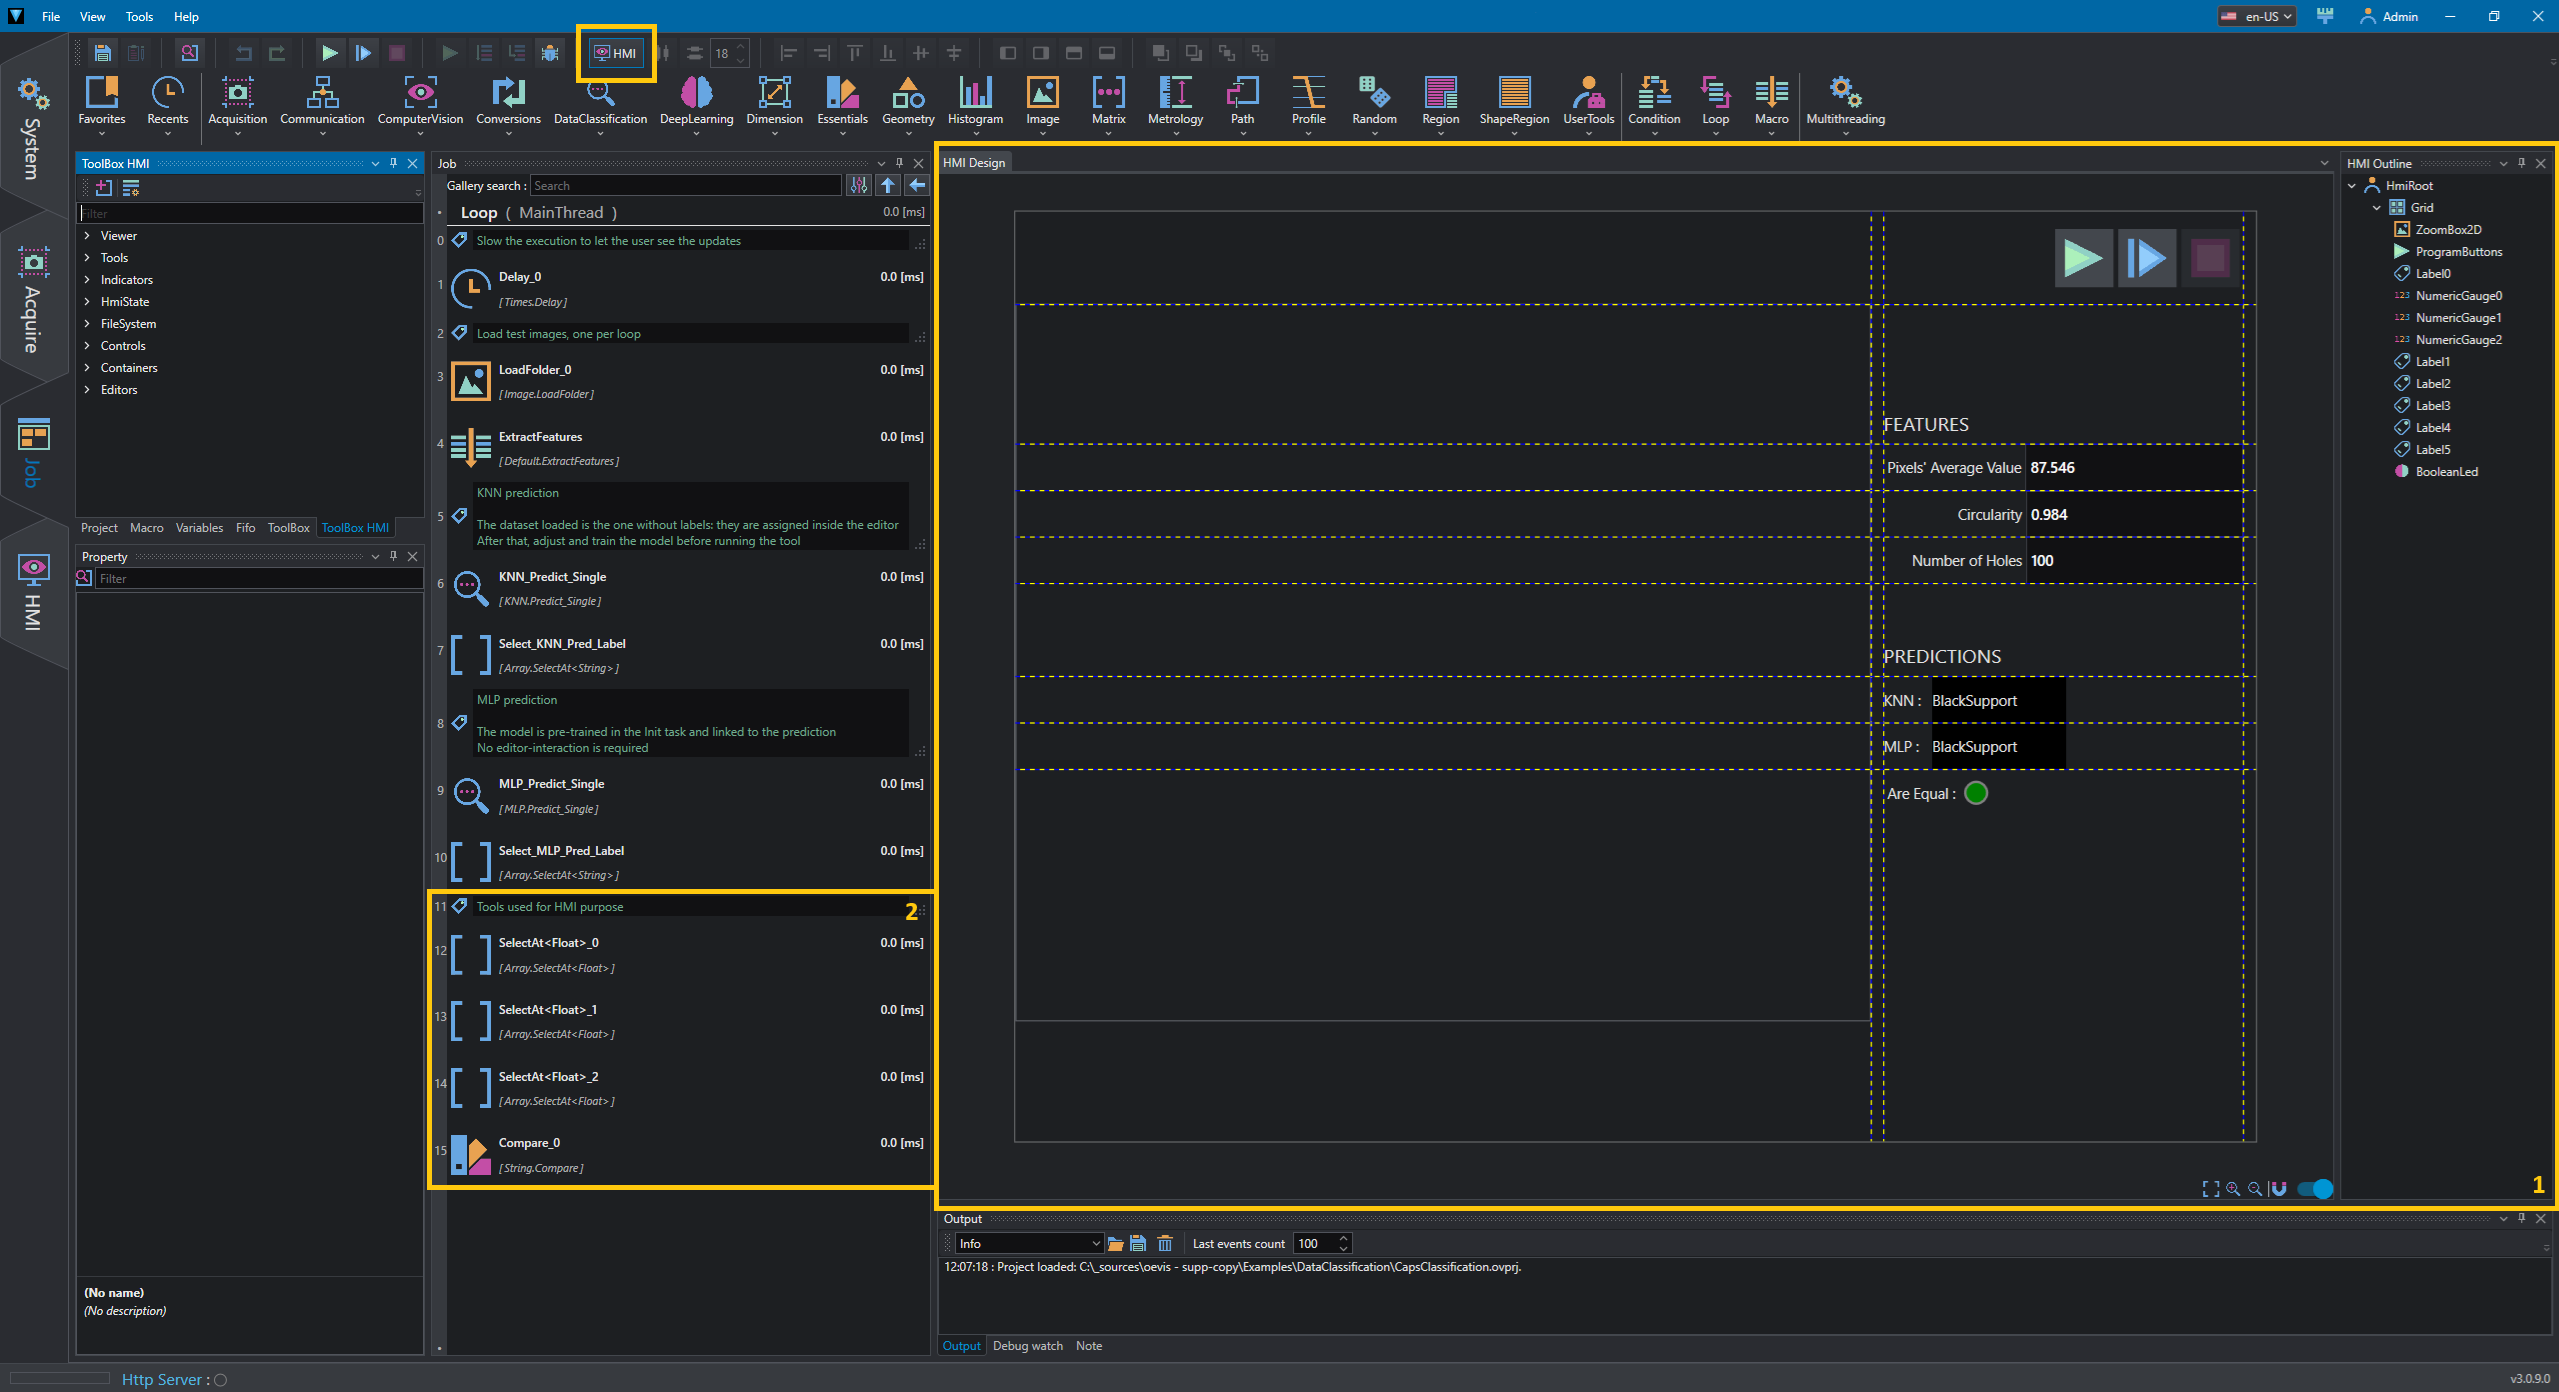
By clicking the HMI button at the top of the Job tab, the HMI designer opens ((1)): here any HMI tool can be edited/removed/added to customize the HMI view. Also, for a better visualization of some properties, in the Loop few tools has been added ((2)).
Instead, by entering the HMI tab on the left, the designed HMI is loaded and ready to be used: by clinking on the RUN button, the program start the prediction of all the images of the test folder, updating the view at the end of every loop.