Execution bar

This section of the UI allows the user to manage the project execution.
In the first five buttons, three are the following:
 — Save — Ctrl+S
 — Undo — Ctrl+Z
 — Redo — Ctrl+Y
Version changes

When opening a project created with a previous version of OEVIS®, any changes in one or more tool's properties called in the project itself, may generate a warning message as shown in the figure:
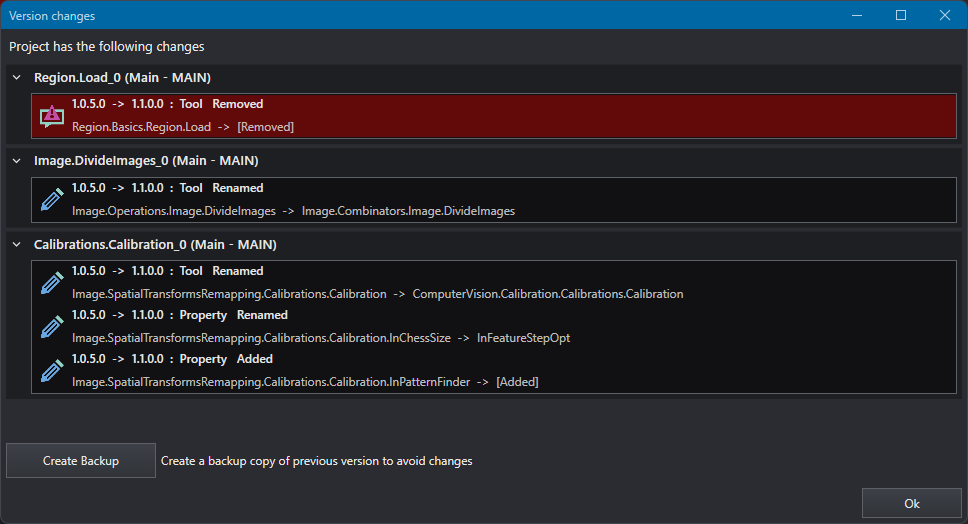
For each affected tool, the source/target version numbers of the change, and the type of change are reported. In some cases one or more properties may be renamed, added or removed. If the entire tool has been removed, it will be reported with a red background. By pressing the Create Backup button you can pack a copy of the project before continuing.
Info
Version change information can always be retrieved from the Execution Panel clicking on the version info button
Affected tools are displayed in different ways, depending on the window you are looking at.
In the Project panel, the indication will appear as  besides the affected section (Init, Loop, Finalize), in the Job section, the tool will be highlighted with yellow background if it contains a modified property or with a red background if it has been removed.
The changed tool properties will be indicated by a yellow exclamation mark.
besides the affected section (Init, Loop, Finalize), in the Job section, the tool will be highlighted with yellow background if it contains a modified property or with a red background if it has been removed.
The changed tool properties will be indicated by a yellow exclamation mark.
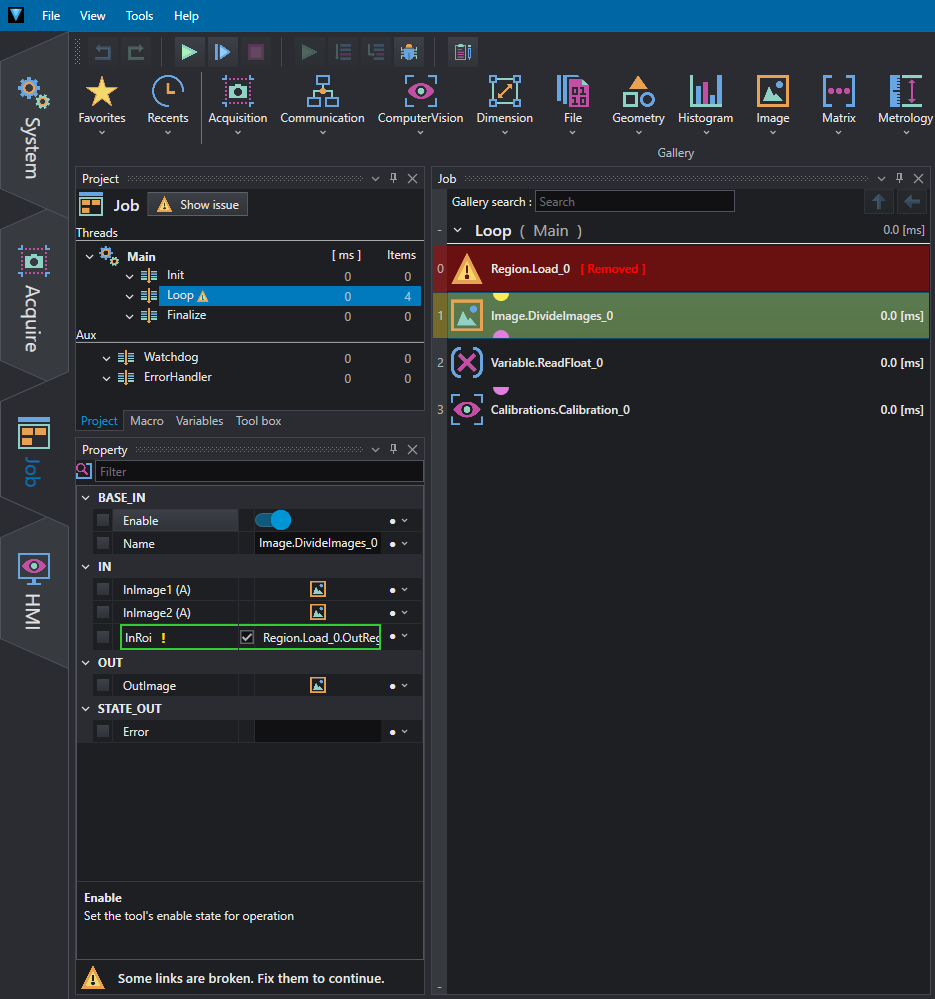
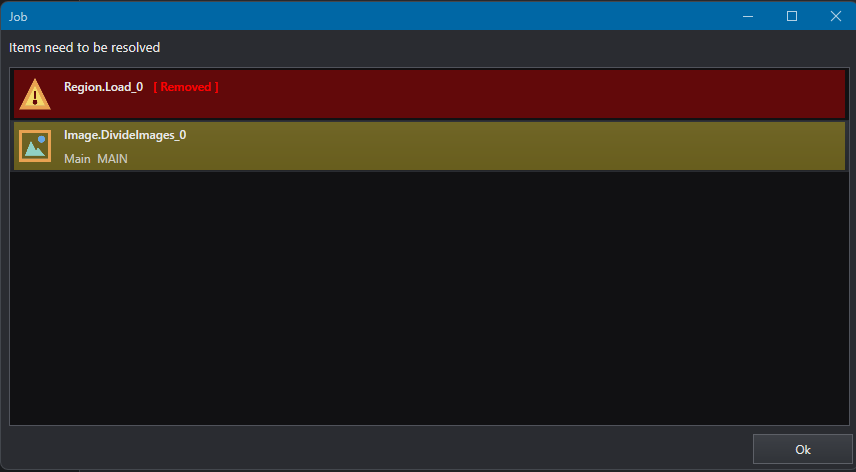
In the Project panel, a Show issue button is also available. Clicking on it, the user will be prompted with the list of tools to be fixed; clicking on each of the tools will navigate to it and to its concerned properties.
Warning
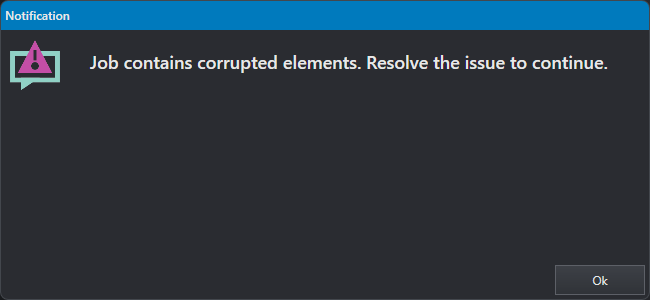
In order to execute the project, you must resolve all issues, otherwise, when trying to executing the project the following error message will appear:
Find in project

This feature allows the user to find a tool or a property that matches a word with its name (both) or type (only tools). By clicking on the icon shown in the execution bar (or by pressing Ctrl+F), the following dialog will appear:
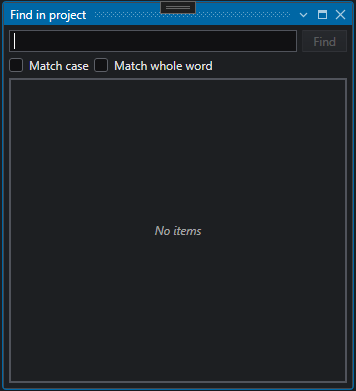
In the textbox, the user can type the word to look for. The search can be made stricter by requesting the match of the cases and/or the match of the entire word.
To showcase this, the example project BlobDetection is loaded in OEVIS® and the word "region" (without any restriction) is searched in it. The results are shown in the following image.
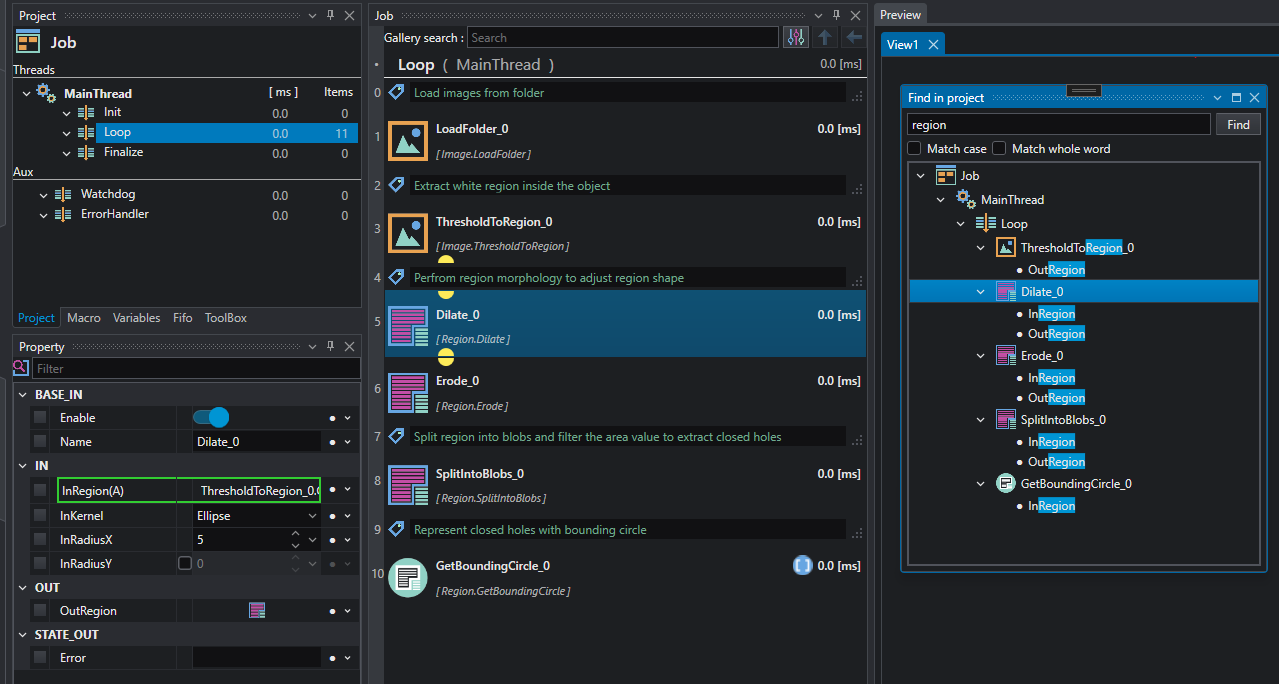
The user can also click on a specific tool/property shown in the results' visual tree, to automatically select the associated tool in the job view.
Run

If a project has multiple threads, the user can select whether to run only the main one or all of them together.
The behavior of the buttons is as follows:
 — Run in a loop — F5: execute until the program is finished or the user presses the Stop button. The execution will start with the Init task, then the Loop task will be executed continuously. The Finalize task will be executed only after the press of the Stop button.
 — Run Once — F6: The execution will start with the Init task, then the Loop task will be executed only once. Finally, the Finalize task will be executed and the application will be in idle mode.
  — Stop — F5: ends the execution of the project.
Debug
An OEVIS® project can also be debugged in order to manage the execution flow and run a tool at a time. This mode is helpful for troubleshooting or checking whether the program is correct or not.
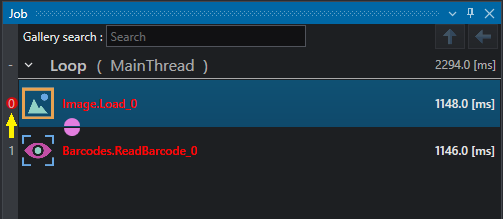
Click on the line number in the job tab to add/remove a breakpoint (red circle) . You can also remove it by selecting the bug icon in the execution panel.

While debugging, the user can:
- — Stop program execution
- — Continue until the program reach another break-point — F5
 — Step over the next task/tool — F10
 — Step into the current task/tool — F11